X
 
  • Filter
  • Time
  • Show
Clear All
new posts

  • Jacks PV grid tie system

    Edit - June 2017: Public URL's to view system output and weather station:
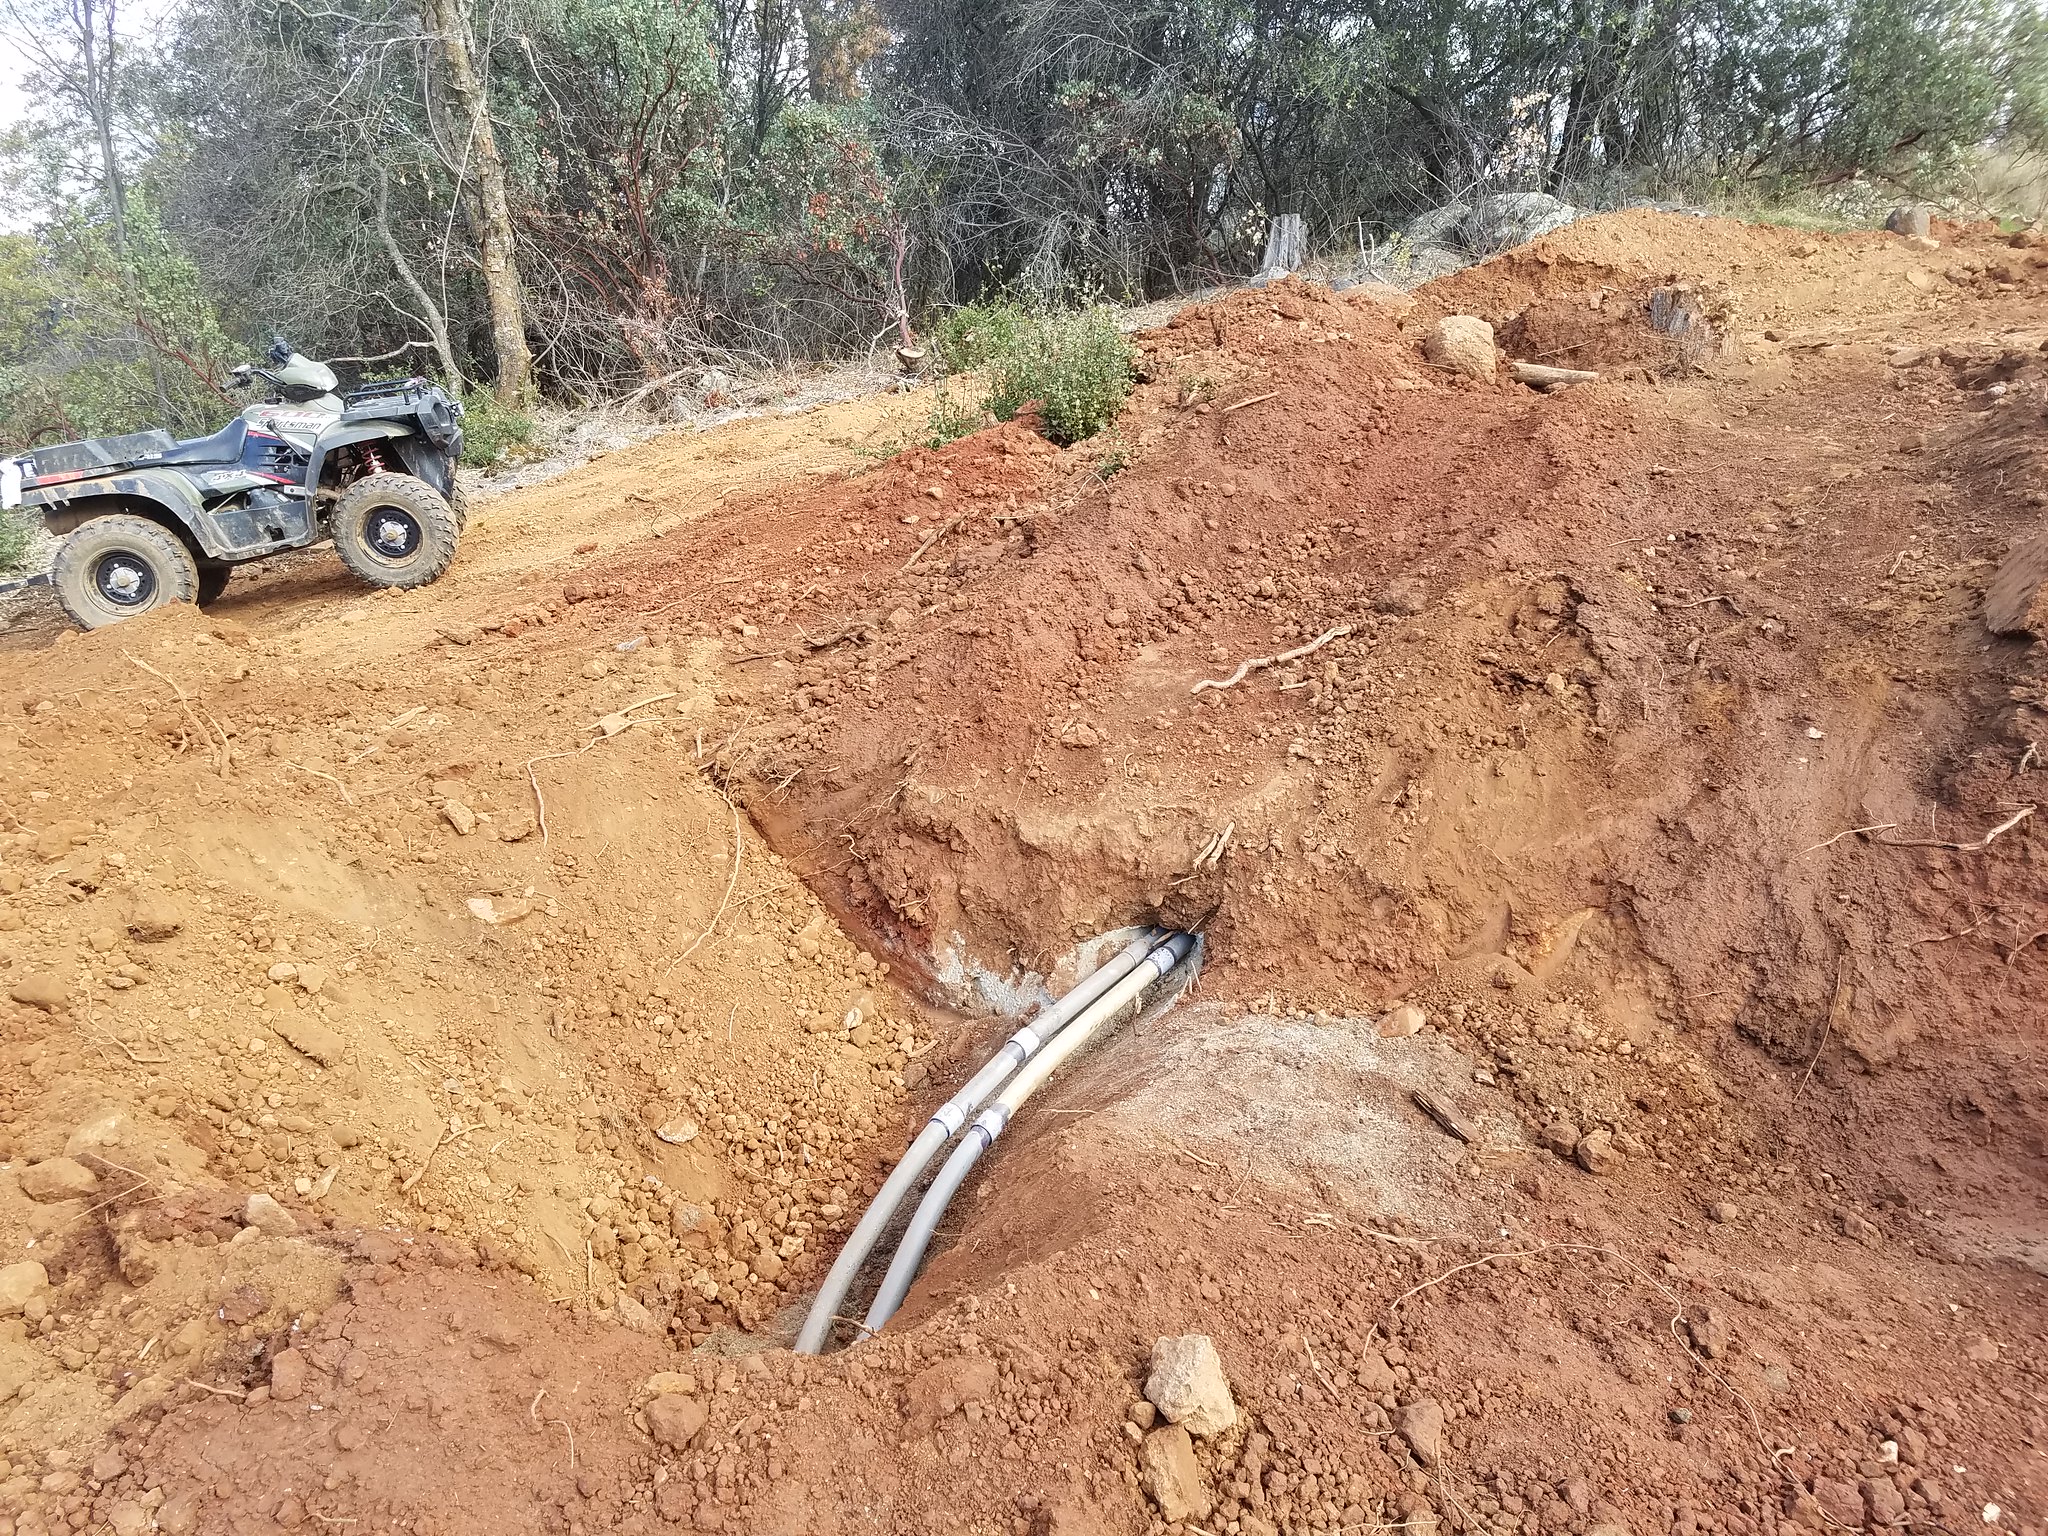
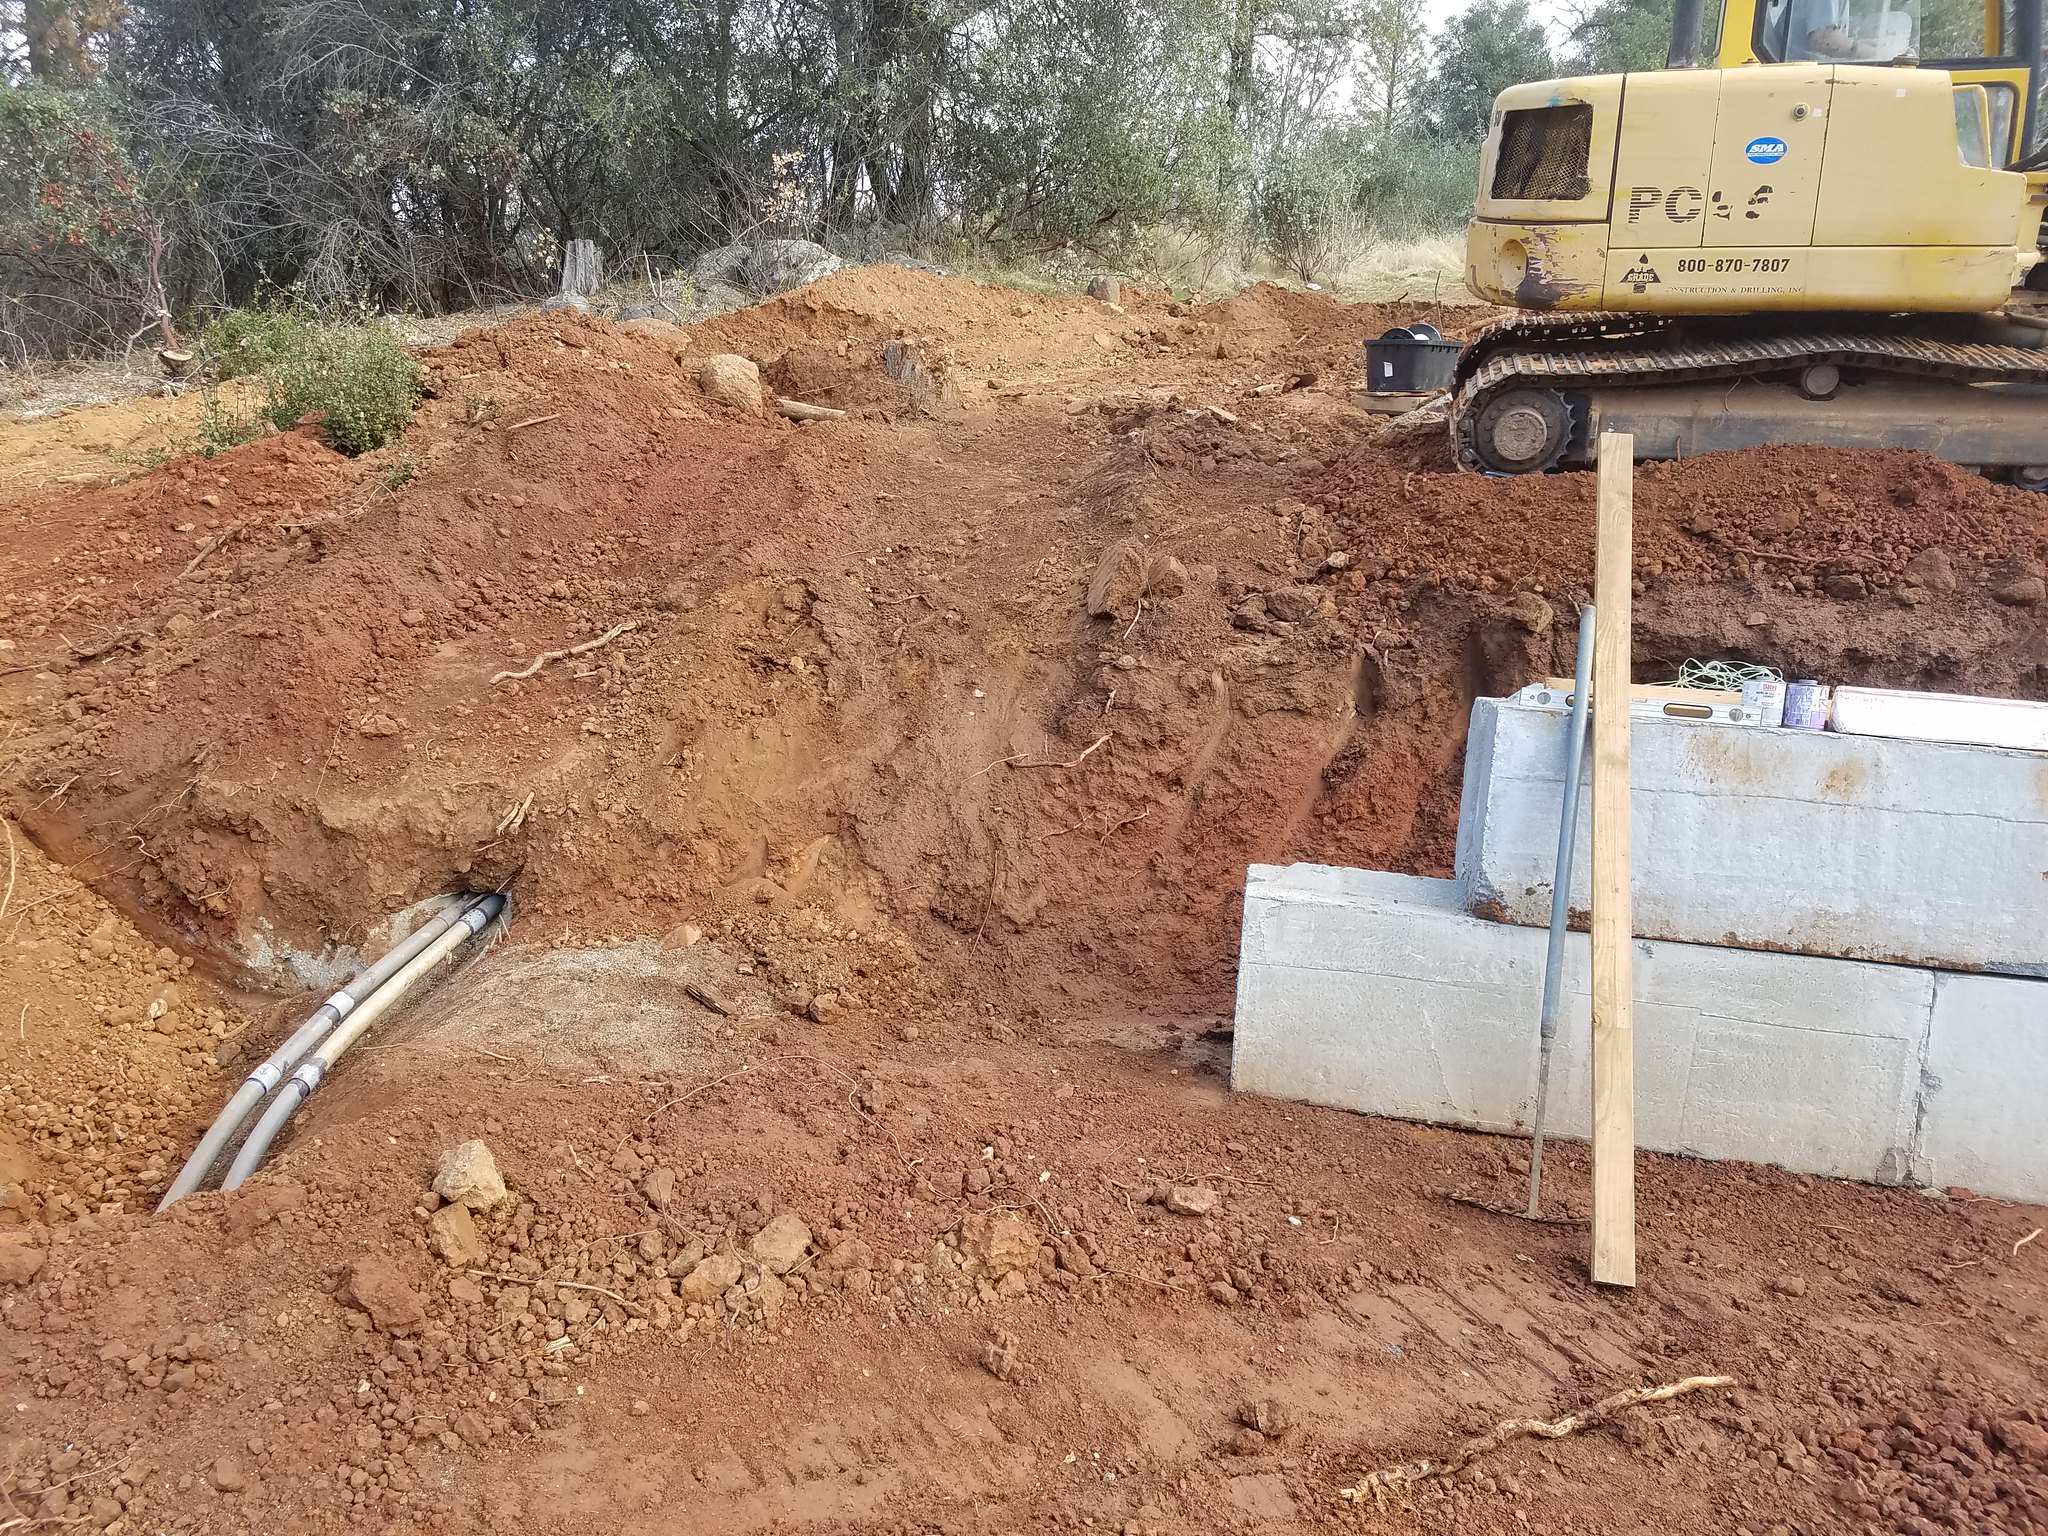
    Summary - building an 80 panel ground mount microinverter grid tie system. Many unique aspects - the most significant is the location which is about 400' from the house and at least 40' lower in elevation. Very poor access complicates just about every aspect - 4WD only down there. Significant excavation needed to deal with grade and it required breaking up the system into four mounts. System is on a hillside that slopes West South West downhill over 20 degrees. System is fully permitted and I am complying with all local and state codes. Also uncommon is the entire system is implementing an NFPA 780 lightning protection system including a ground ring electrode made up of some 610' of class 1 conductor underground of which 520' is more than 30" underground. This is an owner build system, with a licensed electrician reviewing electrical work (required by local codes) and a licensed excavation contractor performing most of the ground work - trenching, filling, excavation and erosion control. This guy is an artist with his equipment and is a friend. Helps to be a Scoutmaster - you meet many parents with amazing skills.

    The ground mount system is an Iron Ridge framework based on 3" schedule 40 galvanized pipe for structure and Iron Ridge rails and mounting hardware. Micro inverters are Enphase M250. Panels are Astronergy 260W panels.

    The system is sized for our usage which is very large compared to most families - large home, lots of children of all ages, foster parents, well system and water storage, pool, wine cellar, huge refrigerators and the largest draw of all - my computer systems for work that run doing simulations and builds 24/7. My office is never cold in the winter - warmest room in the house. The home is new as of 2005 and itself is energy efficient - well insulated, etc. It is the computers that are killing us - these are not little things but large power hungry workstations and server - but its either that or I have to work in San Francisco - so we pay PG&E dearly so I can work at home.

    Because the system is so far from the house service one of the biggest issues for micro inverter systems is voltage drop - Enphase wants you to limit the total losses from wires to 2% but that is not a spec but a guideline. I am able to stay under that 2% from the furthest microinverters all the way to the service meter by oversizing wire - the main run of about 400' is parallel runs of 4/0 and all wires on the mounts is #6. Enphase is center-tied to remove the losses from that #12 cable as much as possible.

    I have been keeping a running blog on google blogger but out of respect for this forum I will not post that address - if you want to see it look at my profile. But will repost pics and comments here since I hope that some of you may find the process interesting - I am sure learning a lot especially from my mistakes. When I started this process I dove into the NEC electrical code and am trying my very best to treat it as a minimum set of standards and exceed it - especially when related to the issues you learn from NFPA 780. I cannot stress enough if you are considering owner install solar to get a copy of the NFPA 70 (NEC) and study it. Even if you don't do it yourself, you will better understand the rules that will apply to the electrical part of your system.

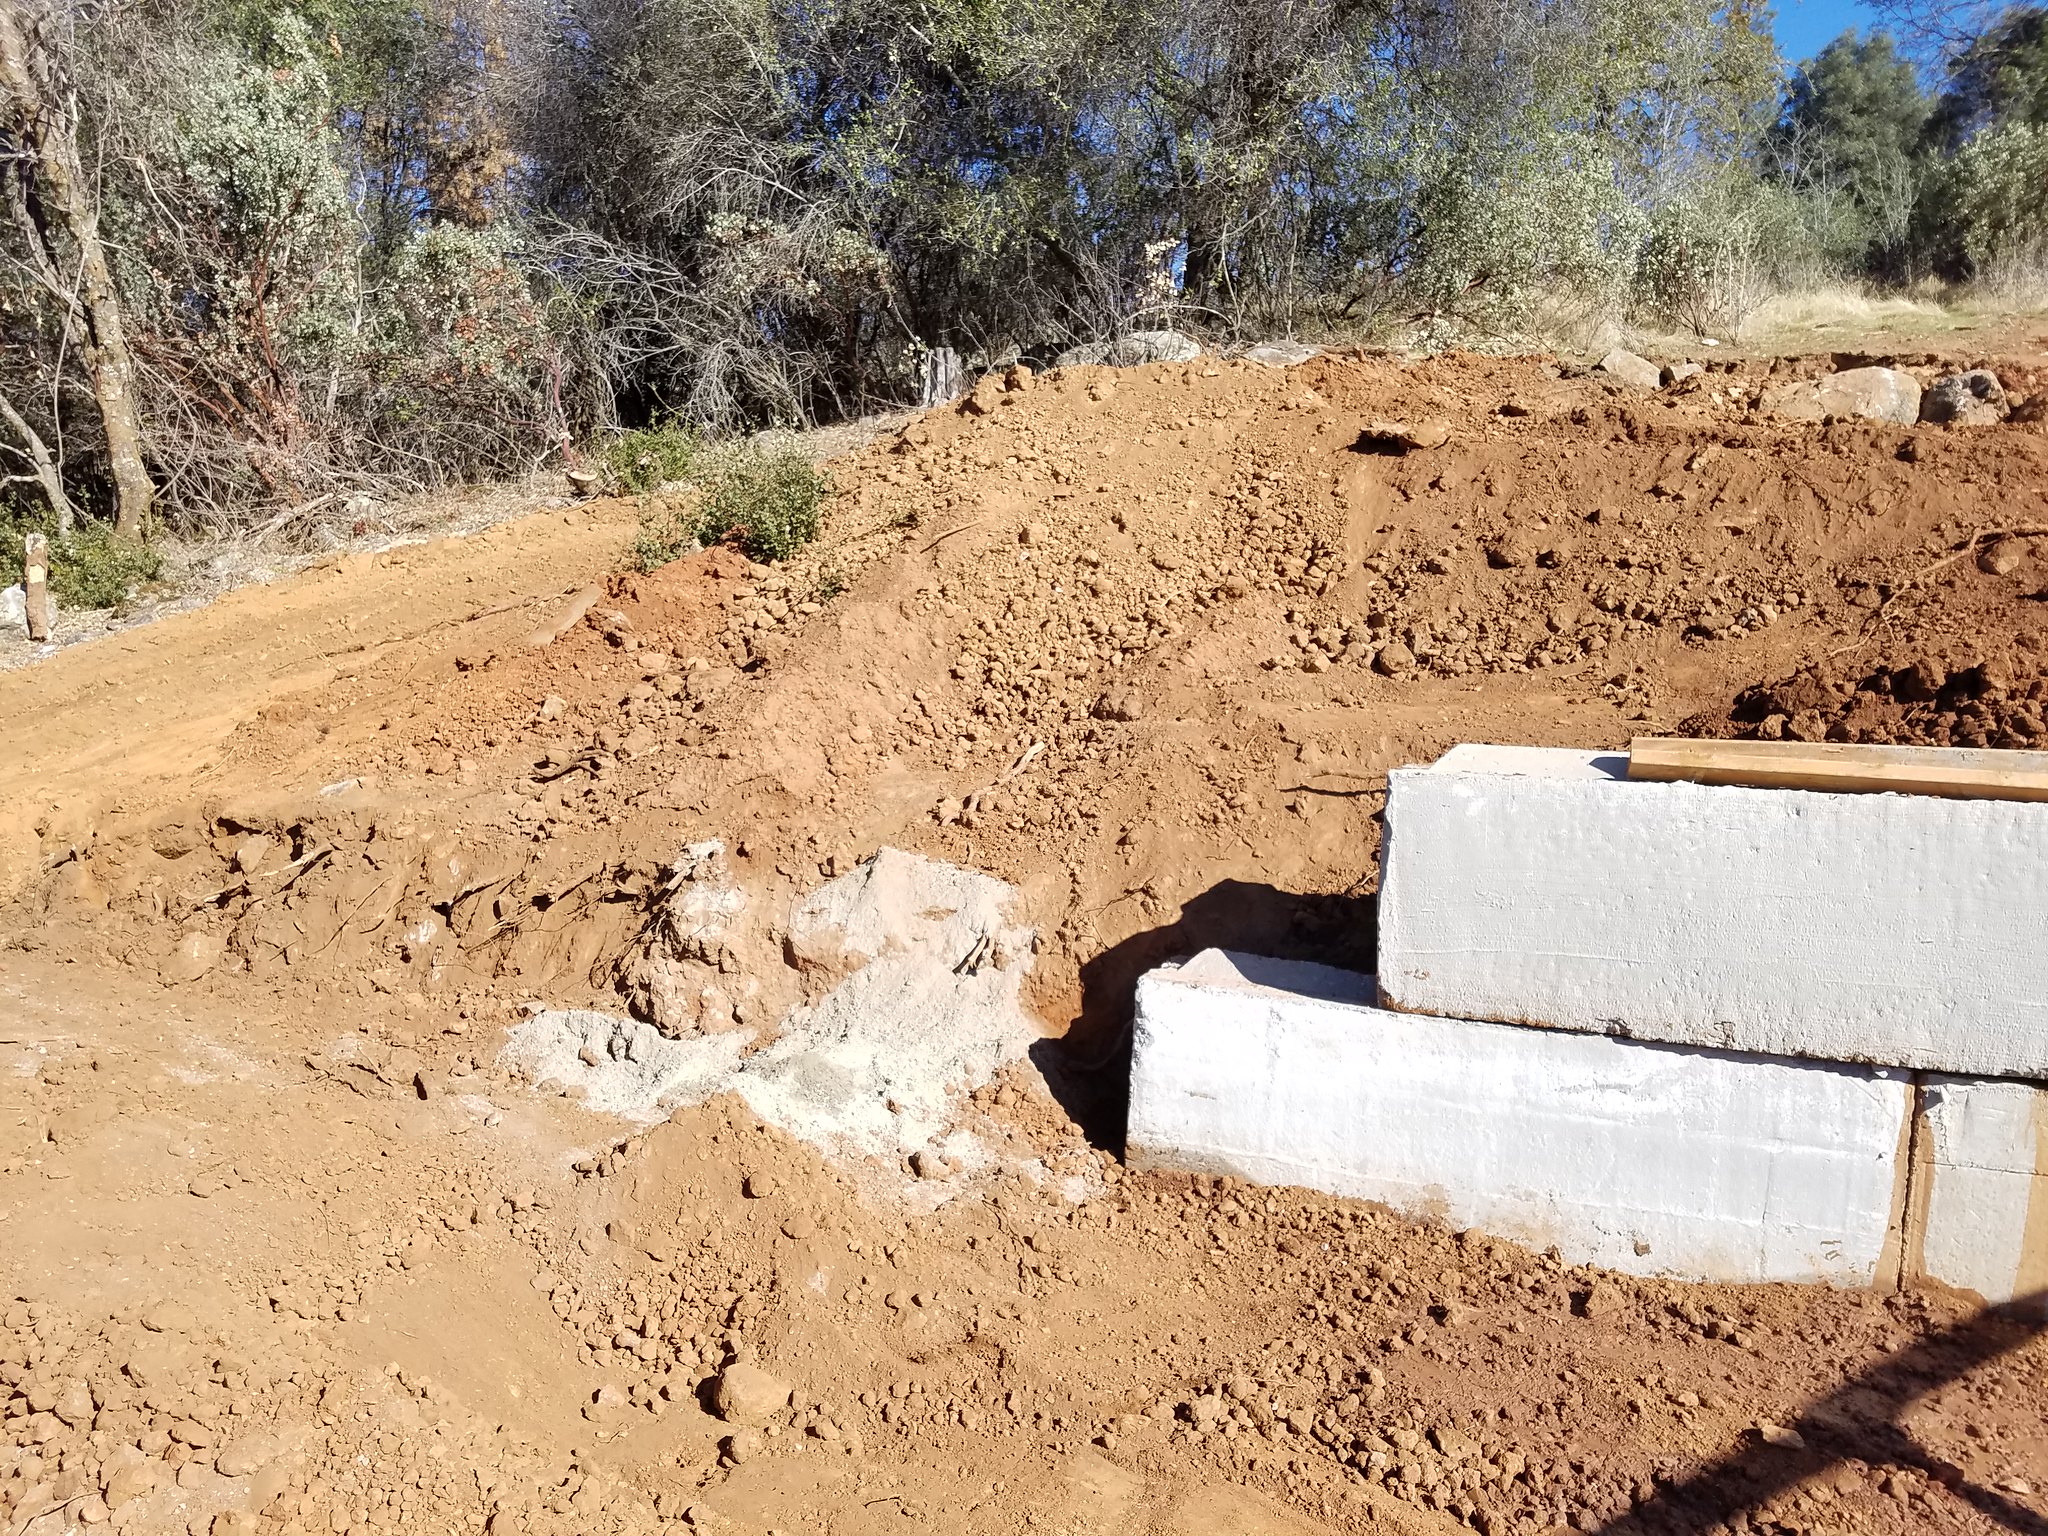
    Current overall status. First inspection passed. Trenches filled, concrete poured, mount framing removed, long run of wire pulled, solar subpanel installed, 1/2 of the rails installed and erosion retaining wall in progress. Wow, can't believe I just summed up 5 months of work in a single sentence.

    I have placed all my photos on a shared Google album but will repost new relevant ones on this forum. https://goo.gl/photos/6XP3sCnMjN6yhWd16 (hope I got the sharing correct).

    Latest status.

    Mounts 2, 3 and 4 have a smaller junction box that simply combines the five 3/4" EMT into a 2" EMT that runs underground (via 2" PVC) to mount 1. I finally finished the three junction boxes.


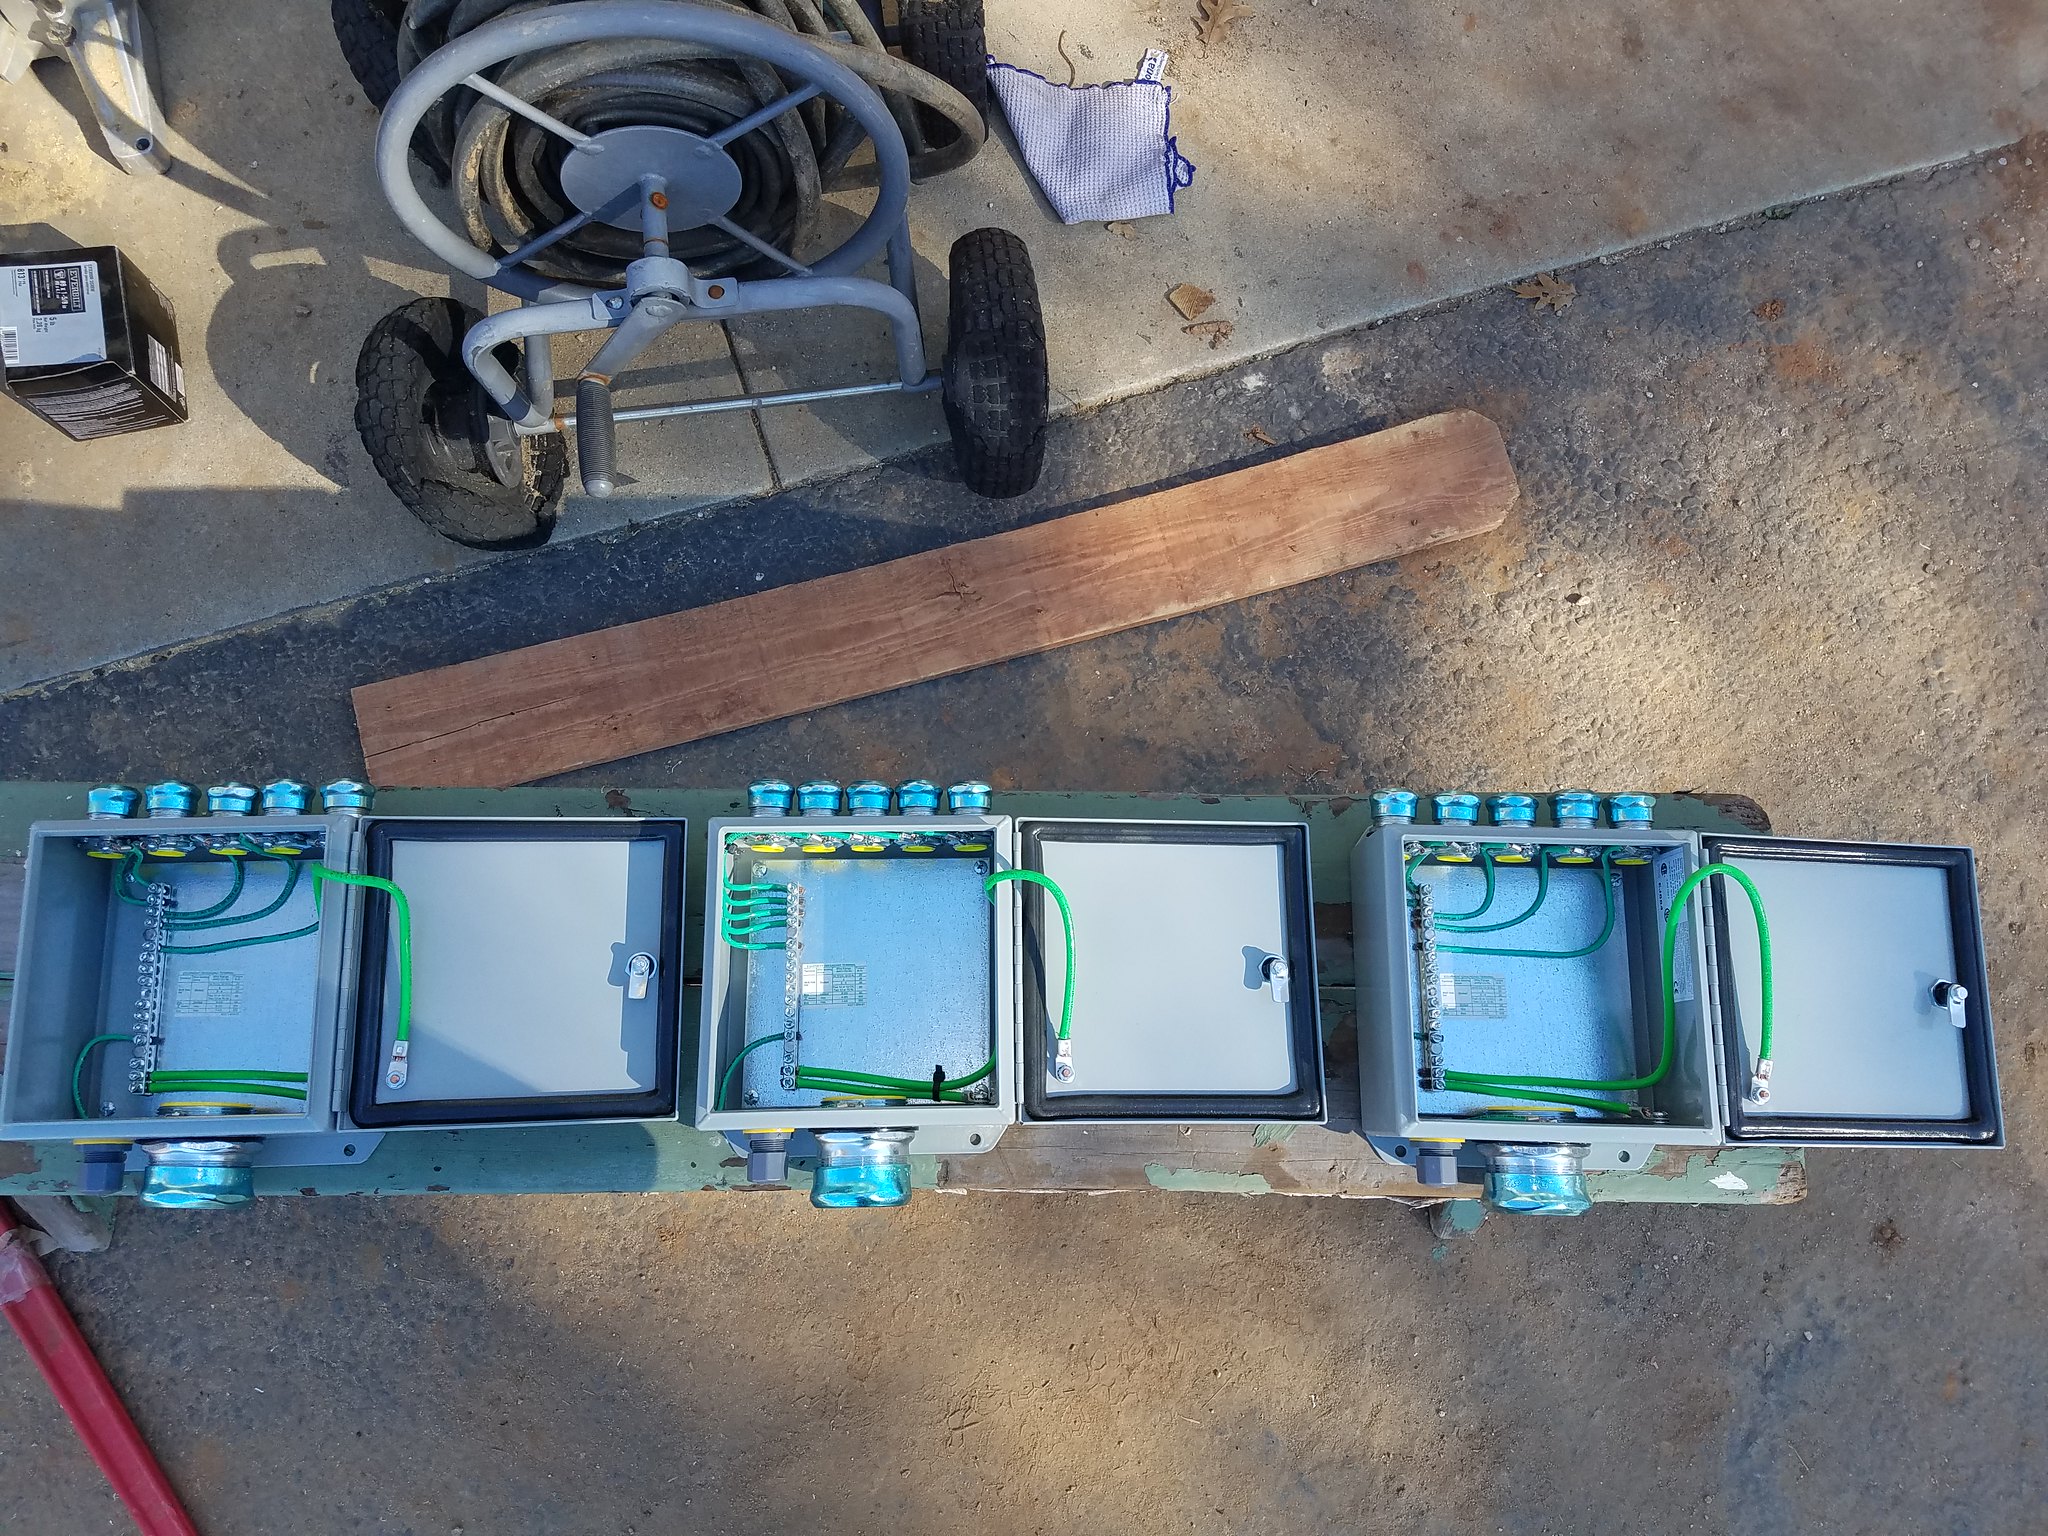
    They are all the same but one (the first one I did - center) I equal spaced the EMT connectors and that was a mistake since those connectors are very close together. This will make connecting the EMT to those connectors harder. The remaining two I had the outside EMT's close the edge and then equal spaced the inside three giving must more spacing between them. The plastic water tight strain relief next to the 2" EMT is where a #6 bare EGC will come out and bond to the metal around the junction box. Over lunch I was able to cut and drill the stainless steel tubing that will hold the box for mount 2 - there are 4 bars per mount (two to hold the box, 1 to strap the 2" EMT, and 1 to strap the 3/4" EMT's). The EMT connectors I am using are Arlington insulated throat. The ground lockrings are from Garvin. I'm not that impressed with the ones from Garvin - they are low cost - but they are thinner than the ones I got from Platt (I only got a few to check them out back in May). I ended up not using the ones from Platt since the threading on the ground stud was different for every EMT size but if I could do it all over again - I would have used the ones from Platt and just dealt with the different threading. - they are simply a stronger lock ring and appears to be made out of better material. This is a case of you get what you pay for.
    Last edited by tyab; 06-12-2017, 12:01 PM.

  • #2
    Very neat project, guess you will finish before winter? Keeping the wire losses minimal is good; it will help avoid the micros tripping
    out on high line. Its tougher to do with AC from micros. What is your latitude? Keep the pictures coming. Bruce Roe

    Comment


    • #3
      With that distance to the house, I would have gone with a string inverter system over the micros. With the string inverter, you could run the high voltage all the way to the house, where the inverter would be. This would allow much smaller wire for that 400' run.

      Comment


      • bcroe
        bcroe commented
        Editing a comment
        Its obvious Jack knows how to work with dirt, concrete, pipe, and wire. Looking at that stack of concrete bags
        makes my back ache; around here we just call the ready mix truck.

        There is an order of magnitude more wire shown than I have, though distances are similar. All those posts in
        concrete are going to do a great job of grounding the framework against lightning. I think this plan goes
        beyond that?

        What I want to know is the snow plan;. Are the panels mounting landscape, with gaps between rows for snow
        to drop through? What is the ground clearance? Clearing them in winter could be quite a project; at least the
        slope I must traverse here with the 4WD snow blower is only about 6 degrees.

        I hope we get more reports through the first year. Bruce Roe

    • #4
      Probably to late now but you would have been much better off running High Voltage Dc from the panels back to the point of service and used traditional string Inverter. Would have been more effecient, way less complicated with less things to go wrong, and a whole lot less expensive.

      One thing you can do is look at using transformers to boost the voltage, but it is a Band-Aid fix throwing more money at a bad investment.
      MSEE, PE

      Comment


      • #5
        Late yesterday afternoon on the lower (West) set of pads for mounts 3 and 4, we are installing a tiered retaining wall using 2'x2'x6' concrete blocks. These require a level grade to place them on. While clearing out the North end which slightly wraps from North to North West North due to grade, the excavator clipped the top of the buried 2" conduit - both pipes. Wire has not been pulled yet, so it just had pull tape in it. This was near the end of a steep down grade and the pipe top was buried about 2-1/2' ft at this point (code is only 18") . Completely by accident, it was the changing grade here - there was both a South and West grade that converged at this point. What was really sad is this part is where I used the Greenlee heat blanket to make a beautiful sweep that did that 90 degree turn with a 20 degree up angle combined.

        This is just below that area where the sweeps start and turn uphill when first installing the pipe and still lacking a lot of the sand from September 8. I don't have an installation picture of the actual impact point which is just around that bend.


        That sweep coming down from mount 4 is a 24" schedule 80 sweep so at this point the top of the pipe is 24" deep. The ground graded up fast from here and right after this initial turn so the trenching went 3' deep (impact spot, 2-1/2' after sand and top of pipe) and it gets over 3-1/2'' by the time we hit the pull box.

        That piece of equipment is huge and just a nick completely shattered both pipes. I don't have any pics of what it looked like in the fading late afternoon light. In the early morning, he dug a nice pit next to the breakage with that equipment and we hand dug out enough to cut off the broken pieces. Inline splicing that was the issue. We are in a rural area and the local pipe hardware store did not have any 2" inline splices in stock.

        Here is after the repair. You can see the retaining wall tying to make a level approach to this area but now it is clear that we can't extend the wall this far since this used to be deeply underground but now is just below the surface after this grading. How we repaired this was we used a PVC reamer - that same tool you use to make those nice beveled edges on schedule 80, and reamed out the inside ridge of a 2" coupler. That allows you to slide it all the way on to the pipe. Then we inline patched it - and slide down that connector with lots of glue. I had to use the Greenlee blanket to do a funny flattened S curve to line up the pipes due to that nice custom sweep that use to be here.


        This picture shows what he was trying to do - level across for continuing the retaining wall but he is deeply cutting into that embankment which is why we hit that pipe. He has already graded down from the top the area just over the pipe - he thought it was deeper.


        So its all fixed now and we pulled new pull line from the pull box - which is up the hill. We decided to only extend the retaining wall another 6' from where it is above and just grade out the rest to meet county codes. The impact point is again covered with about 2-1/2' of coverage, of which is at least foot of sand.


        Fun morning!
        Last edited by tyab; 11-28-2016, 02:42 AM.

        Comment


        • #6
          Ya on the concrete - it was a huge project. My friend was not available due to his Cal-Fire work, and thus we had no way to get raw material down there. So we did it the old fashion hard way - bags. 12 pallets (56 bags per pallet) of 60 lbs bags to fill those 16 holes. I moved the bags 12 at a time in my quad trailer from my driveway down to the site and restacked them. Could not move more at a time since the weight made it hard to control my quad due to the grade. Used a electric mixer 3 bags at a time to mix it. I borrowed a 10k lbs trailer from a friend and picked up those pallets two at a time - the most I could tow with my Yukon. I did about 1/2 of the holes myself solo, and hired some of my football player scouts over a couple of weekends to pour the rest. I talked to one of the concrete companies up here and they said the only way they would do it is build a big bathtub on the cal-de-sac and pump it the 600' from there to the site (this is a net 80' of elevation drop). I don't even want to tell you the price they quoted - it was crazy.

          The 672 bags of concrete mix cost just under $1300 before tax from Home Depot. I cleaned out three Home Depots over a week getting that concrete.
          Last edited by tyab; 11-16-2016, 06:13 PM.

          Comment


          • littleharbor
            littleharbor commented
            Editing a comment
            FYI, Those 60 lb bags are perfect for mixing in a 5 gal. bucket with 1 gal. of water and a drill mounted paddle mixer. I have done this many times. With a helper you can mix a bag a minute.

        • #7
          bcroe - latitude is 37 degrees. I'm in central CA, middle Sierra mountains at the 3200' level, about 20 miles from Yosemite entrance. We don't get too much snow at this lower elevation (maybe a foot or so before it melts) so the lowest part of the rails is about 18" off of the grade, varies from mount to mount and all of the pads have a slight downhill from East to West. If I was a 1000' higher in elevation then you start getting some serious snow here. Layout is landscape, 4 wide by 5 high. Planning on minimal gaps between panels. Panels facing true south with a fixed tilt of 25 degrees.

          If we get a big snow then my plan is to put on the snow boots and walk down with a big broom and brush them off, pushing it mostly to the west where we have a drop off for all mounts - basically pushing it over the retaining wall. And that brings up a good point - need to go find some sort of long strong broom. Any recommendations?

          It turns out those posts in concrete are not that good for grounding or lightning. Iron Ridge design has the posts 2/3 of depth of the hole, so with 5' holes I have about 3-1/2' in each hole. That does not come close to meeting 250.52(A)(2) or (3) for grounding electrode. I'm following NFPA 780 for the mounts which requires a ground ring electrode 780.12.5.1.1 that meets 780.4.13.4 thus I have a class 1 conductor that completely surrounds each mount and interconnected so all four mounts make a large ring.

          Comment


          • #8
            Ok those mounts looked a lot flatter than mine at 42 deg Lat. Snow there might be a lot less of an
            issue than here where we a few feet (varies greatly) every winter. Ground clearance is about 2'
            here, but snow sliding off 12' of panels easily gets higher than that (and I have to get the 4WD
            snow blower). Somehow standing there pushing snow across 4 or 5 panels just sounds like an
            impossiblility. I just finished spacing out panels so the snow would never have to move more
            than one panel to drop, with multiple piles being much smaller.

            The snow pusher should be built so there aren't any hard spots that might drop down and crack
            a panel. You won't have to worry much about voltage with micro inverters. I'm doing 400VDC
            strings in winter, so I treat them with extreme respect including an insulated handle brush.

            Hope you are operational before snow hits; that is just days away here in N ILL. Send more
            pictures then. You have an exceptionally good lightning ground system; that means it probably
            will never be tested. Bruce Roe PVGap2.JPG

            Comment


            • #9
              Originally posted by tyab View Post
              ...........

              If we get a big snow then my plan is to put on the snow boots and walk down with a big broom and brush them off, pushing it mostly to the west where we have a drop off for all mounts - basically pushing it over the retaining wall. And that brings up a good point - need to go find some sort of long strong broom. Any recommendations?

              .....
              Here is my little device to remove snow from my ground mounts:
              IMG_1506.JPG

              IMG_1506.JPG

              Those are three Sno Pros bolted together with side wires to provide stability. Sno Pros will not scratch or mar the surface of your solar panels. I use a 12 foot telescoping pole. Its aluminum, but some people would be more comfortable with a wood pole.

              First pass you push snow up and over the back of the array. Second pass you pull snow down to the first row of panels. Third pass you pull all remaining snow off of panels.

              Job done quickly.
              Last edited by DanS26; 11-17-2016, 07:04 PM.

              Comment


              • #10
                Originally posted by tyab View Post
                Ya on the concrete - it was a huge project. My friend was not available due to his Cal-Fire work, and thus we had no way to get raw material down there. So we did it the old fashion hard way - bags. 12 pallets (56 bags per pallet) of 60 lbs bags to fill those 16 holes. I moved the bags 12 at a time in my quad trailer from my driveway down to the site and restacked them. Could not move more at a time since the weight made it hard to control my quad due to the grade. Used a electric mixer 3 bags at a time to mix it. I borrowed a 10k lbs trailer from a friend and picked up those pallets two at a time - the most I could tow with my Yukon. I did about 1/2 of the holes myself solo, and hired some of my football player scouts over a couple of weekends to pour the rest. I talked to one of the concrete companies up here and they said the only way they would do it is build a big bathtub on the cal-de-sac and pump it the 600' from there to the site (this is a net 80' of elevation drop). I don't even want to tell you the price they quoted - it was crazy.

                The 672 bags of concrete mix cost just under $1300 before tax from Home Depot. I cleaned out three Home Depots over a week getting that concrete.
                Jack,

                You have heard from me before for a faster, easier, safer way to do things.........

                Masons here now do not mix cement.......yes I know it goes against everything you know......just throw the dry cement in the hole with your pipe....then just add water or better yet, let mother nature provide the moisture. The cement will be just as hard and have the same characteristics as if you mixed the it with water before pouring it in the hole.

                I know.......you're slapping your head right now......all that work for nothing gained........


                Comment


                • #11
                  Originally posted by DanS26 View Post

                  Jack,

                  You have heard from me before for a faster, easier, safer way to do things.........

                  Masons here now do not mix cement.......yes I know it goes against everything you know......just throw the dry cement in the hole with your pipe....then just add water or better yet, let mother nature provide the moisture. The cement will be just as hard and have the same characteristics as if you mixed the it with water before pouring it in the hole.

                  I know.......you're slapping your head right now......all that work for nothing gained........

                  The only caution there is that if you are using an aggregate mix (cement concrete rather than pure cement), and you are, you need to make some effort to mix the cement, sand and aggregate which may have settled in the bag before dumping it into the hole.
                  There are also potential problems with voids if you use this technique for anything other than the simple Pole-In-A-Hole pour.
                  SunnyBoy 3000 US, 18 BP Solar 175B panels.

                  Comment


                  • #12
                    Originally posted by inetdog View Post

                    The only caution there is that if you are using an aggregate mix (cement concrete rather than pure cement), and you are, you need to make some effort to mix the cement, sand and aggregate which may have settled in the bag before dumping it into the hole.
                    There are also potential problems with voids if you use this technique for anything other than the simple Pole-In-A-Hole pour.
                    Much easier to stir the dry mix than to stir the wet mix.

                    Comment


                    • #13
                      Originally posted by DanS26 View Post

                      Much easier to stir the dry mix than to stir the wet mix.
                      Much easier to carry too!
                      SunnyBoy 3000 US, 18 BP Solar 175B panels.

                      Comment


                      • #14
                        Oh yes......forgot to mention......driving ground rods in clay or sandy soils does not require step ladders, sledge hammers (or hammer drivers) and loads of work.......just dig a small depression and fill with water. Then take the ground rod and slowly and methodically move the rod up and down by hand. Add more water in the depression as required. The rod will sink easily by just the piston action. You can sink an 8 foot rod with this method before you can get the stepladder and sledge out of the tool shed. If you hit a rock, move over by six inches.

                        Better, easier, faster and safer.......

                        I know...your slapping your head right now.....all that work.......
                        Last edited by DanS26; 11-17-2016, 08:39 PM.

                        Comment


                        • #15
                          Originally posted by DanS26 View Post
                          Oh yes......forgot to mention......driving ground rods in clay or sandy soils does not require step ladders, sledge hammers (or hammer drivers) and loads of work.......just dig a small depression and fill with water. Then take the ground rod and slowly and methodically move the rod up and down by hand. Add more water in the depression as required. The rod will sink easily by just the piston action. You can sink an 8 foot rod with this method before you can get the stepladder and sledge out of the tool shed. If you hit a rock, move over by six inches.

                          Better, easier, faster and safer.......
                          But this method arguably does not meet the NEC requirement for a driven ground.
                          The soil can shrink away from the surface of the rod as the excess water dries out.
                          SunnyBoy 3000 US, 18 BP Solar 175B panels.

                          Comment

                          Working...
                          X