-
Last edited by DanS26; 11-17-2016, 09:11 PM. -
I have hand driven many rods with this method. Around a gallon per rod. Realistically, a soil engineer will confirm that soil moisture will change dramatically by season and by rainfall rate, etc. The dynamics underground are very different than above ground or surface evaporation effects causing expansion or contraction especially with clay soils.
Although I have not measured the Ohmic resistance values between hand driven vs mechanical driven rods....I would guess there is very little difference. If anything I would bet that hand driven rods with this moisture would have a lower resistance than dry driven rods and would easier satisfy the NEC resistance requirements, at least for new construction. But nobody just drives just one rod...so no one really knows.
Comment
-
Just a couple of more comments about hand driven (wet) rods vs mechanical driven (dry) rods.
When you hit a rock (happens quite frequently) with a hand driven rod, you just pull it out easily and move over 6 to 18 inches and complete the job. Totally different with a mechanical driven rod hitting a rock.....that rod will not come out without heavy mechanical help. What do you do?...get another $25 rod out of the truck?...or just cut the rod off and call it job done? Many inspectors are on to that by looking for the serial number, etc. stamped at the top of the rod.
-
-
The spot where my meter is has a ground rod just under It which is direcltly in the flower bed that gets watered. It's not sprinkler-spray watered, but it does pool directly on the ground where rod enters.Comment
-
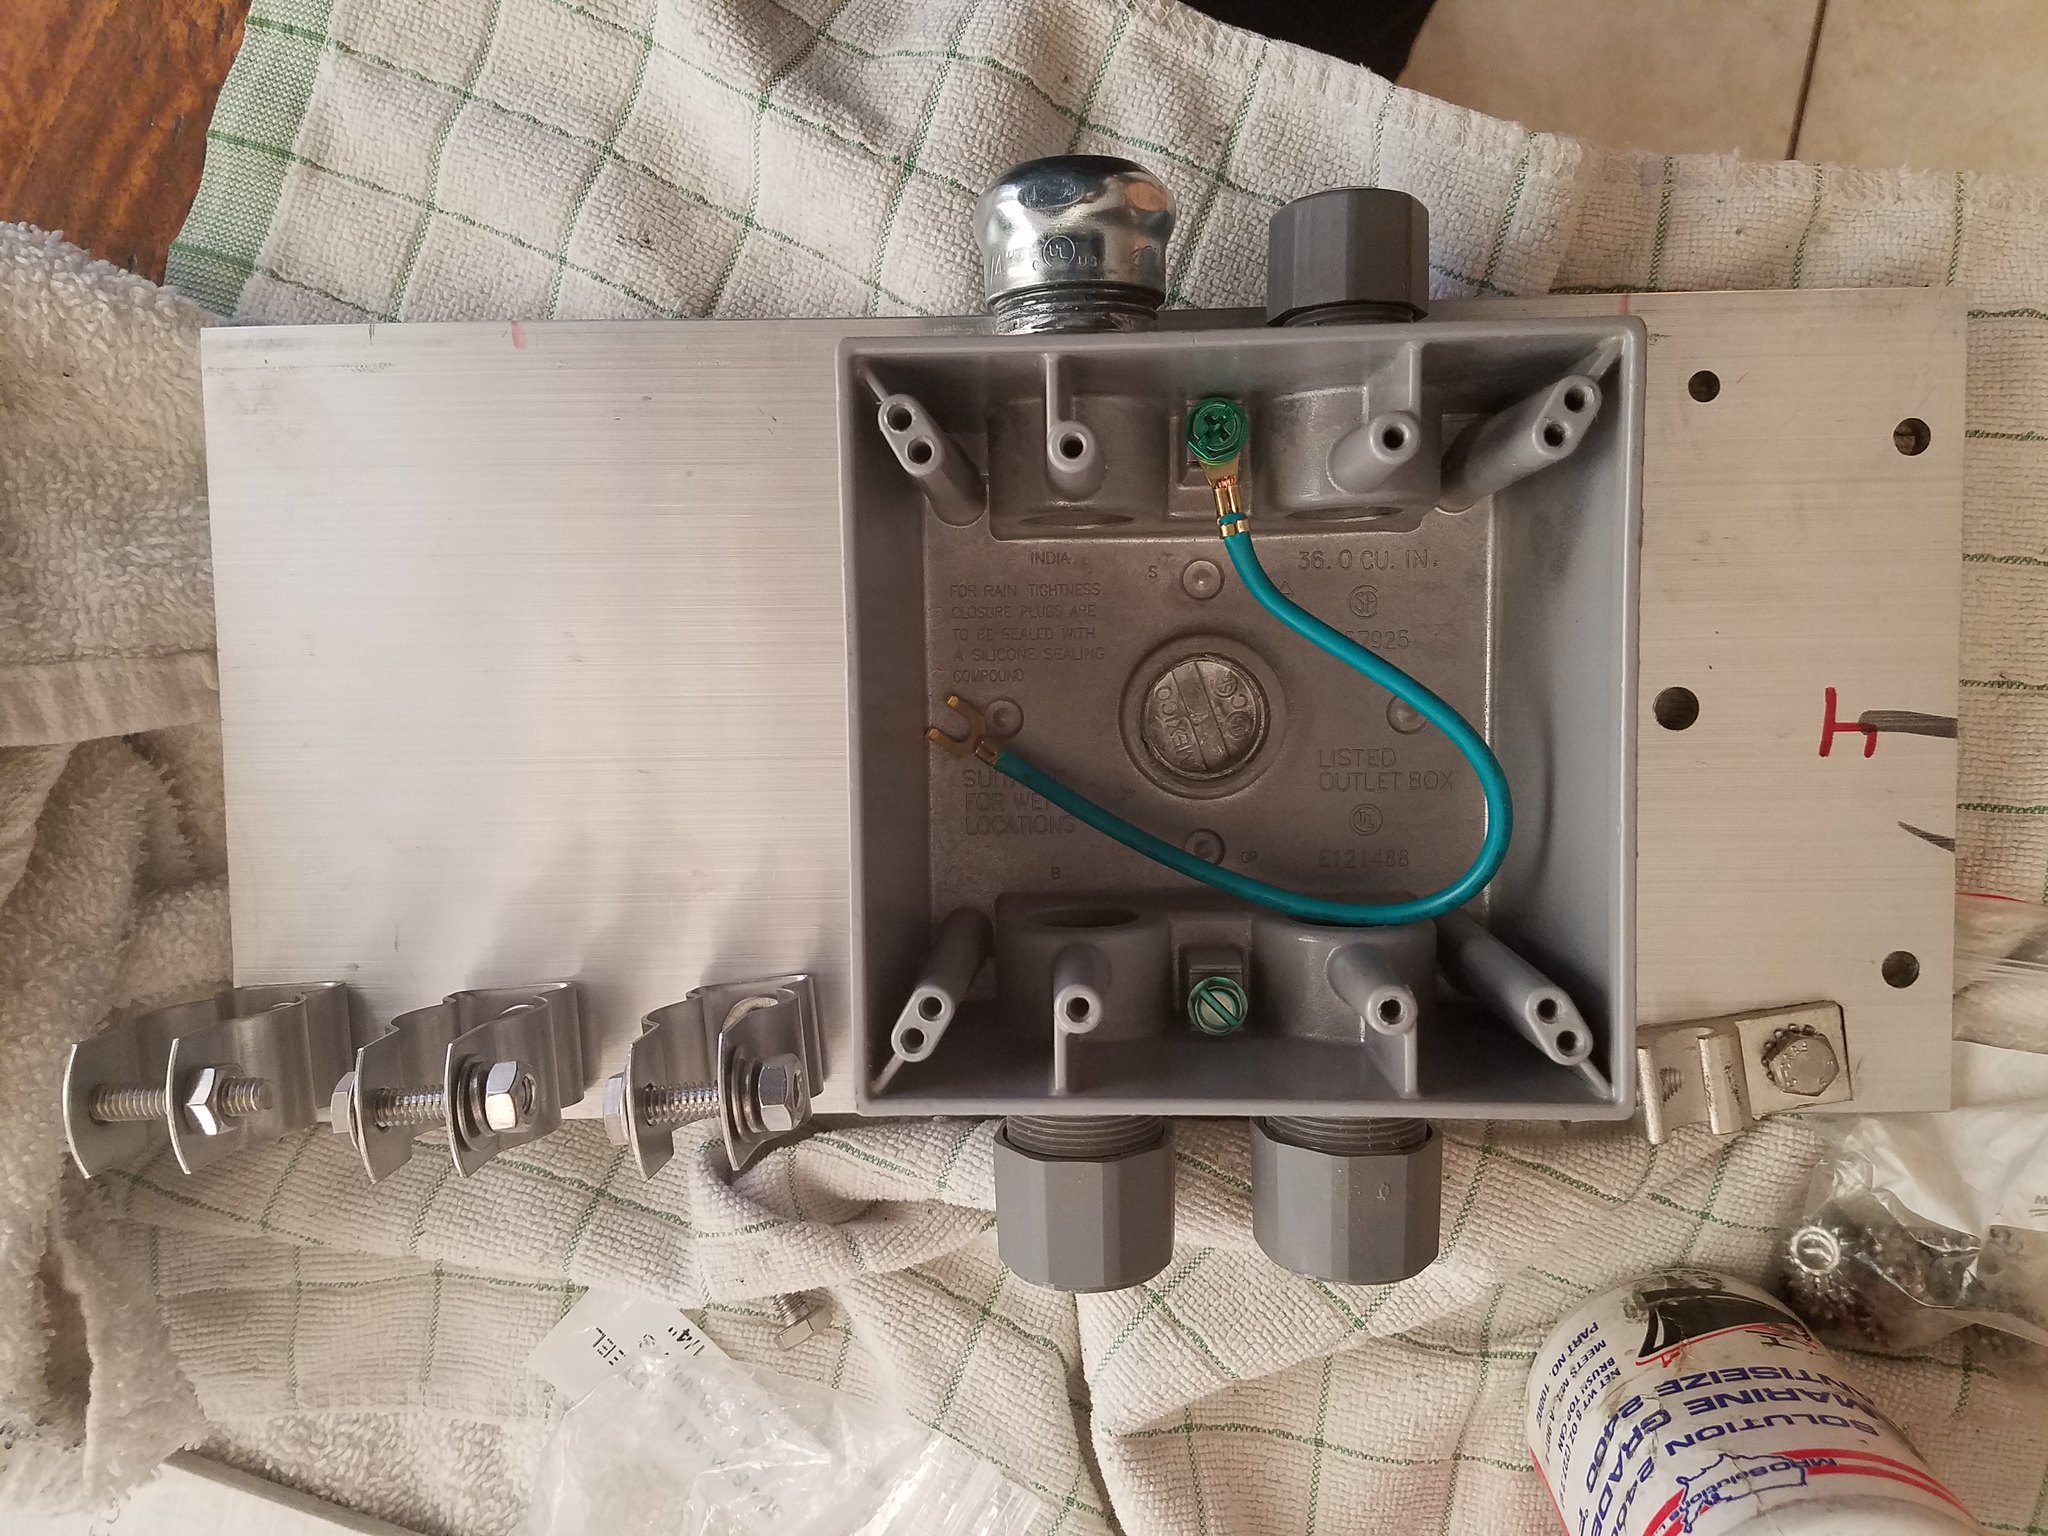
Last April I designed some custom supports for the Iron Ridge rails to hold both the EMT conduit straps and the deep junction boxes I need to meet the fill requirement from table 314.16(B). I finally got them installed on two mounts and did the EMT runs on one mount before rain forced me inside.
These are 6" wide 1/4" thick aluminum plate and I drilled holes to hold a junction box without any drilling in the box, ground lugs, EMT straps and attaches to the Iron Ridge rails with bolts. To help support I also have a 2" x 3" 90 angle aluminum 1/4" support that bolts the the lower rail slot.

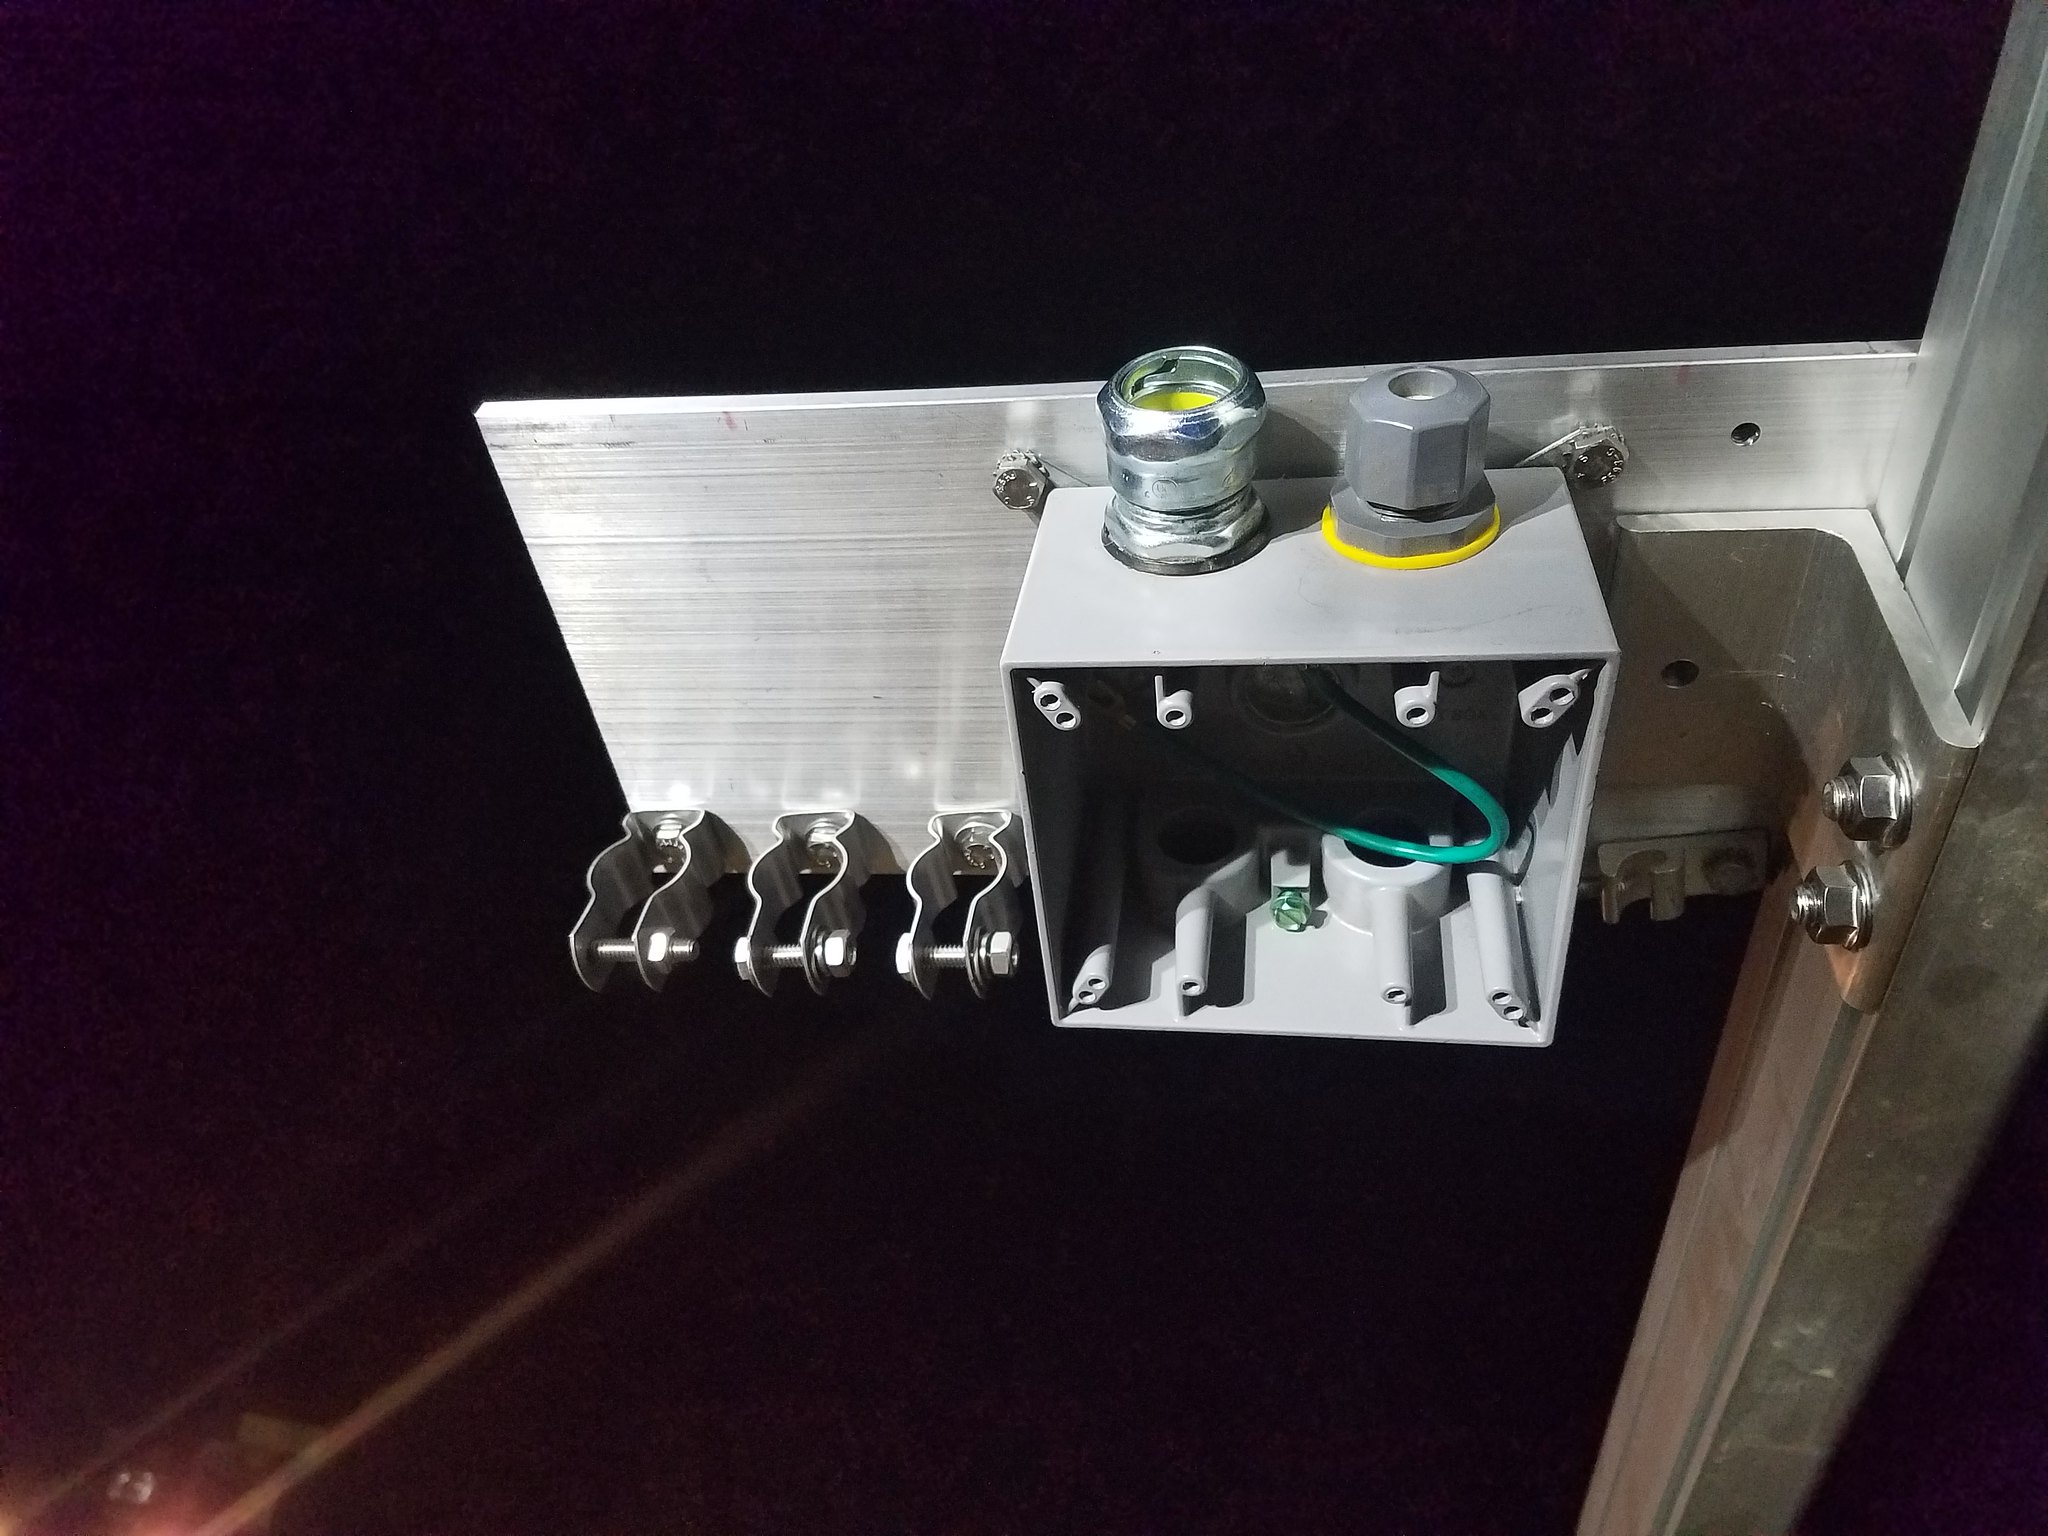
Rows 2, 3 and 4 have the longer version and it looks like this. The EMT straps are stainless steel from Garvin.
And on the rails ready for EMT. Yes I have a flood light setup down there and I'm doing stuff every night until I'm too cold - after that sun goes down its has really been cooling off.
And with EMT installed. This was the most complex bends I have ever done with EMT - heck prior I think the hardest thing I ever did was a simple 3/8" box offset. The EMT goes flat over the back horizontal pipe before offsetting and 90 down to the AC combiner box.
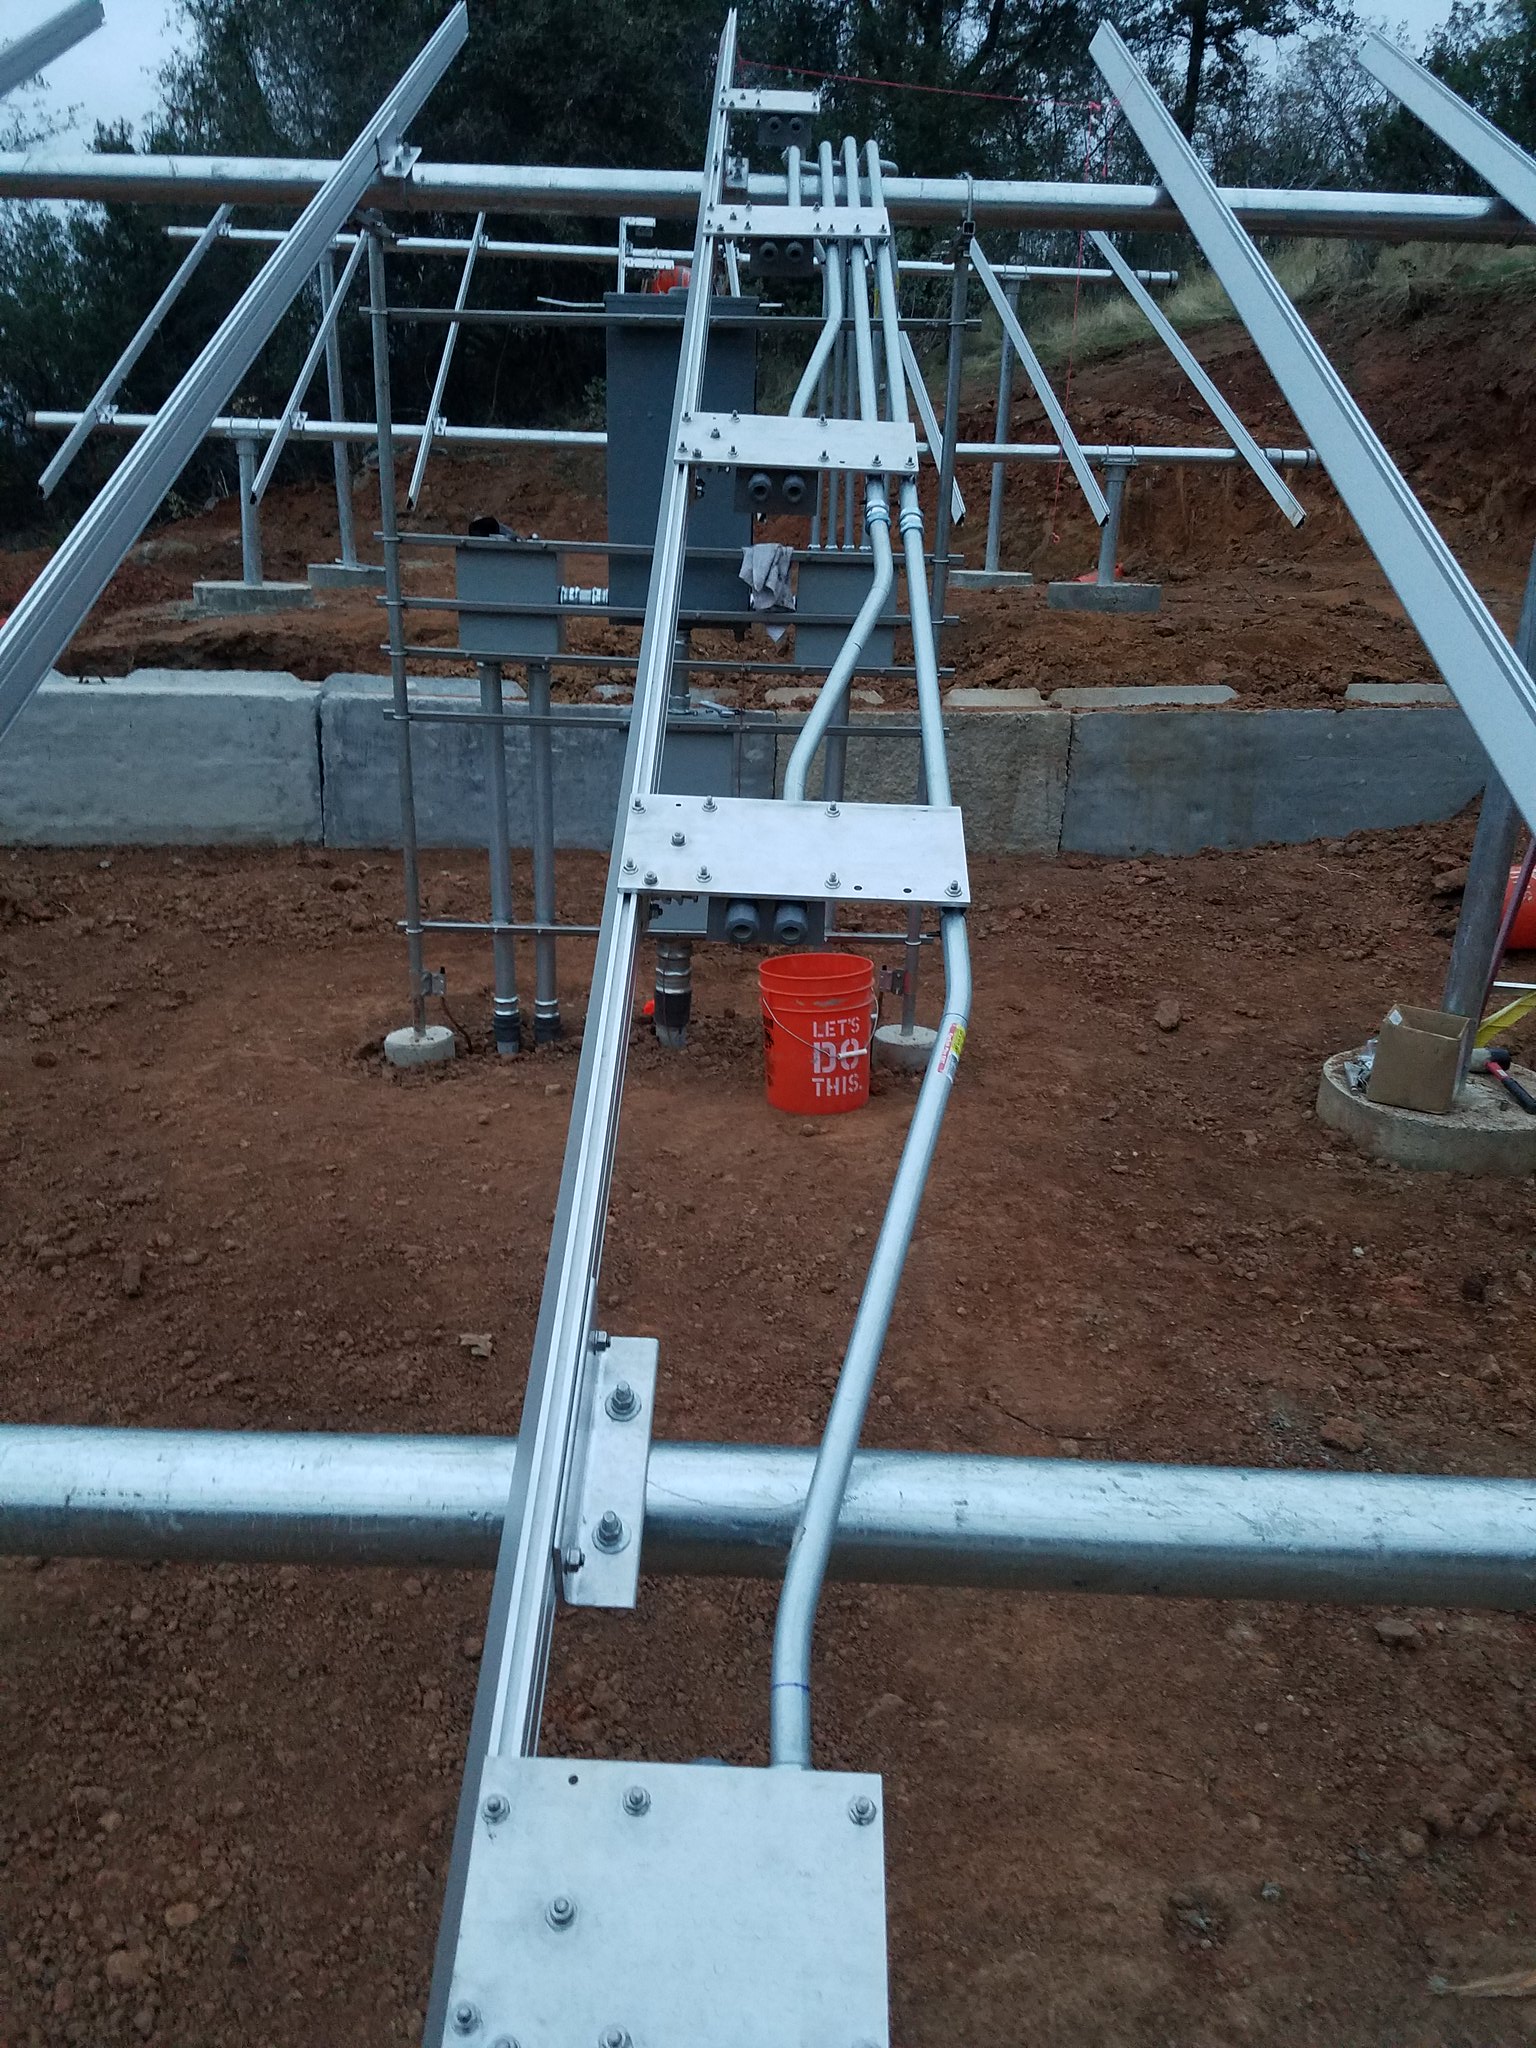
Mount 1 is ready for wire pulling and just needs the Enphase cable setup to wire it up.Last edited by tyab; 11-28-2016, 02:39 AM.Comment
-
I used a hammer drill on the ground rods, not too bad that way except for the three that hit a rock shelve, so they were just cut off below grade, bonded to the ring electrode and replacements ones driven at a different location. All of the rods were in a 3' trench so drive distance was less 3' less than would have been otherwise. There is so much rock here I don't know if any of the rods I drove did not have push/break some rocks out of the way. My 13rd old drove one of the rods with the hammer drill and his of course went right in - no issues.
I had no idea you could mix cement like that - would have saved some work, but we did mix right next to the hold and pour right into the holes - no wheelbarrowing or anything like that. But all that lifting into the mixer and the surrounding mess...
The broom sounds great, are you using like a pool aluminum pole kind of thing or something different? I do know that those pool poles are really thin and bend easily.Last edited by tyab; 11-21-2016, 12:29 PM.Comment
-
Telescoping poles are readily available. It helps to collapse the pole when working close to the ground on the last pass. Here are some sites....if allowed by admin......

Comment
-
I finished up the EMT for mount 2. Like mount 1 it is now ready for wiring up once I layout the Enphase cable.
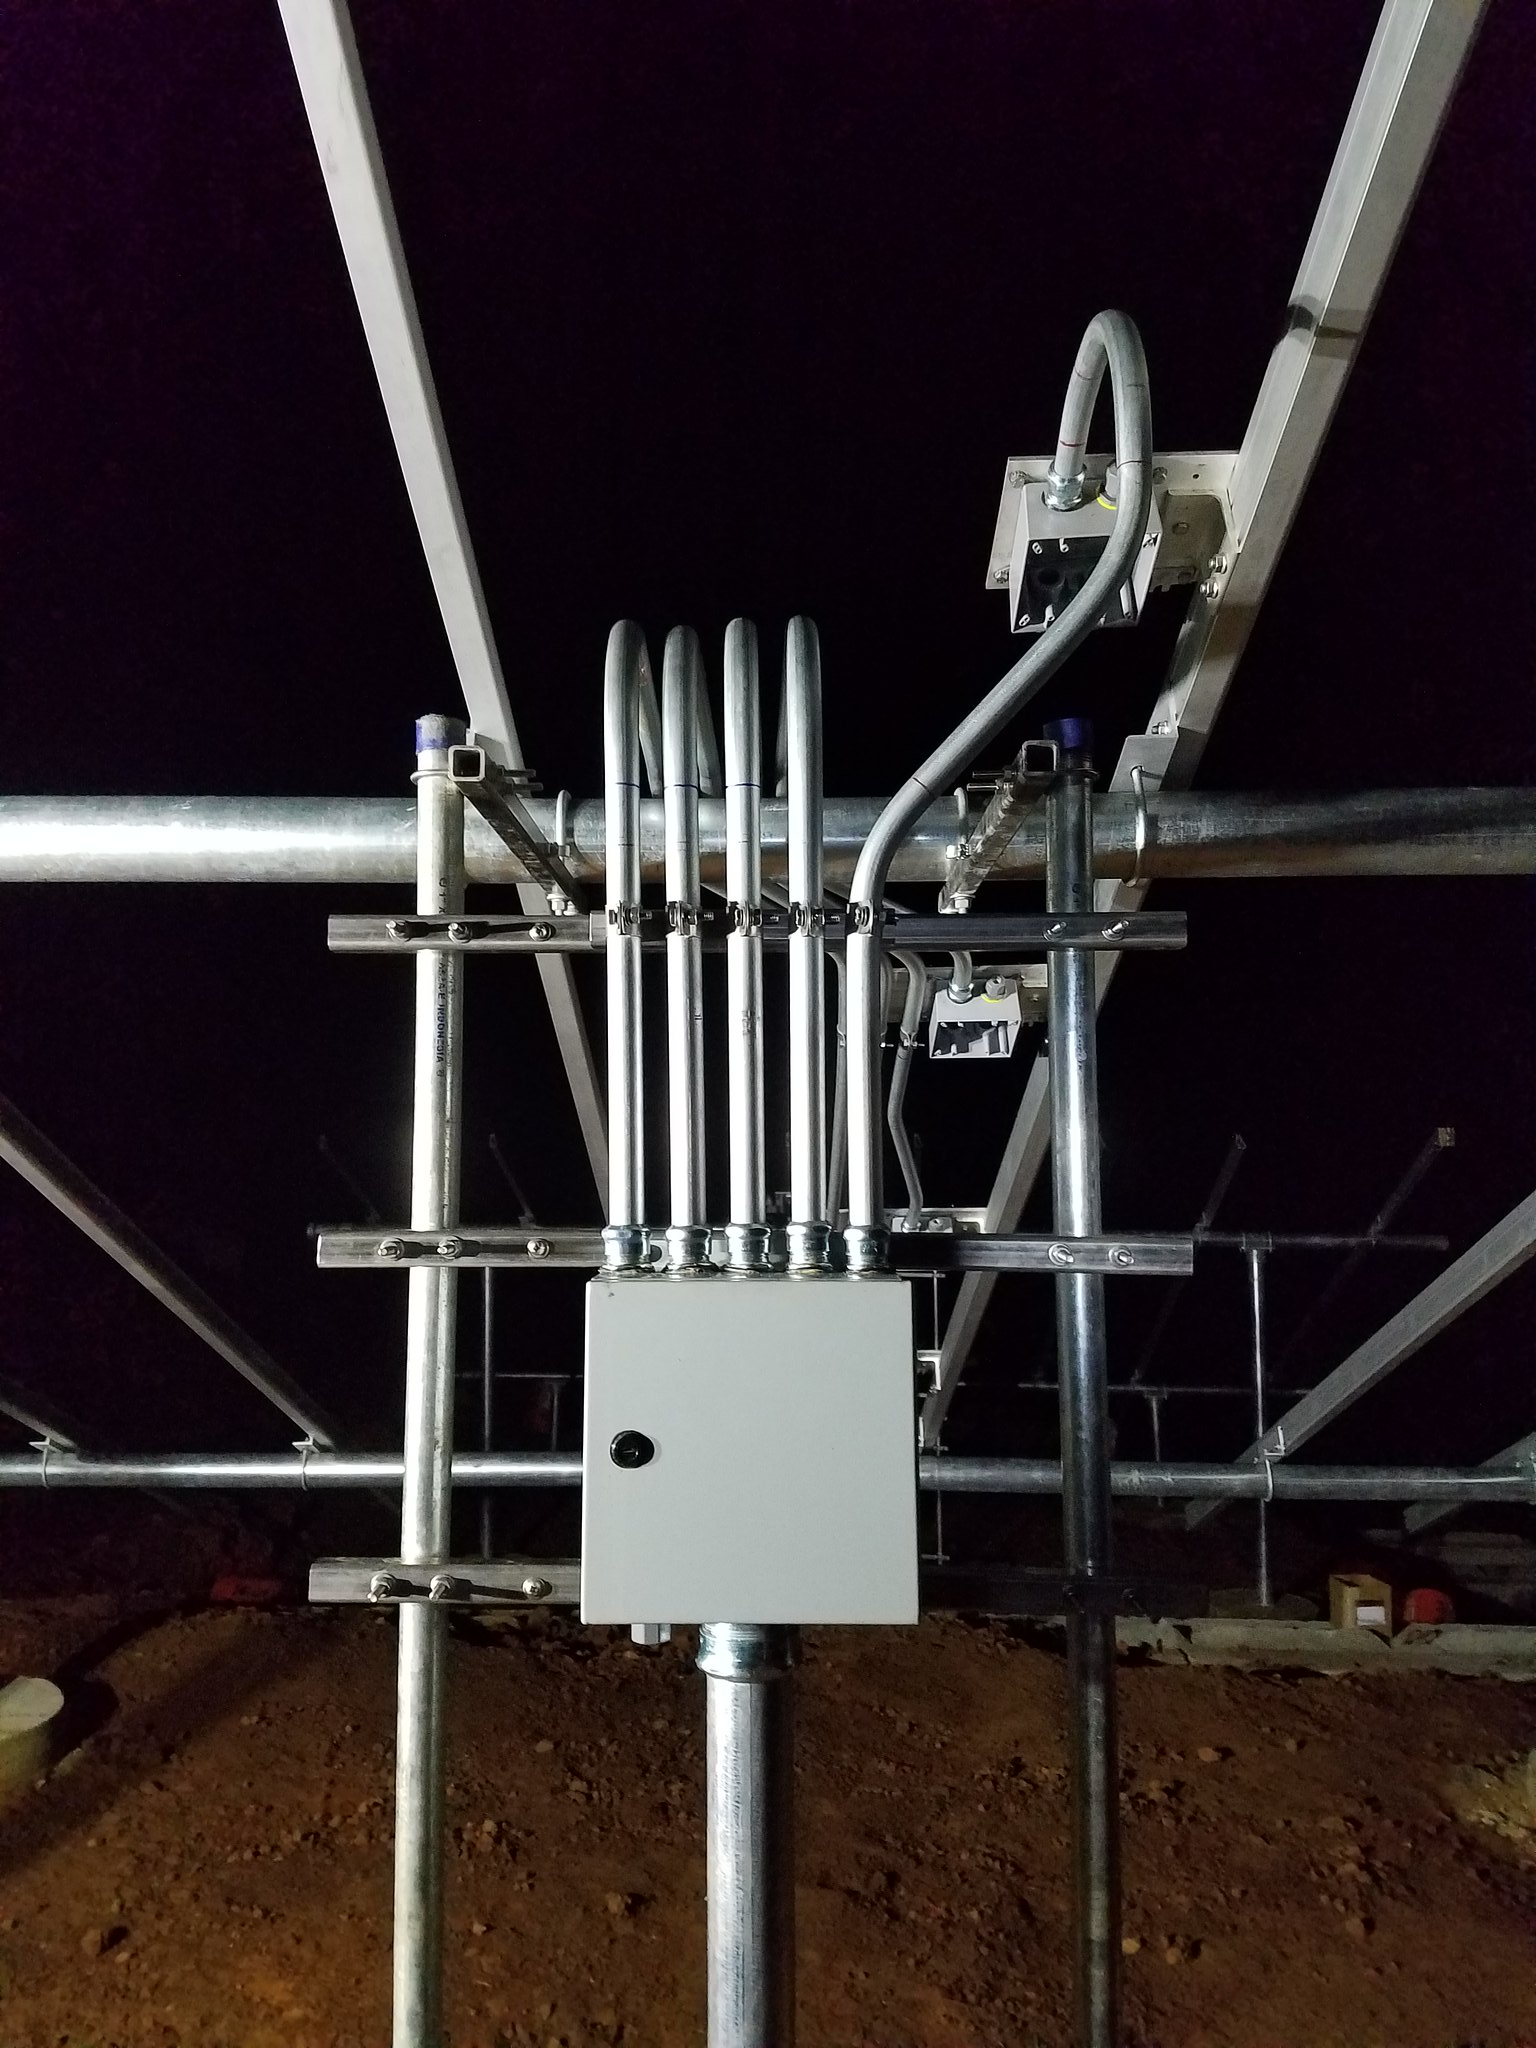
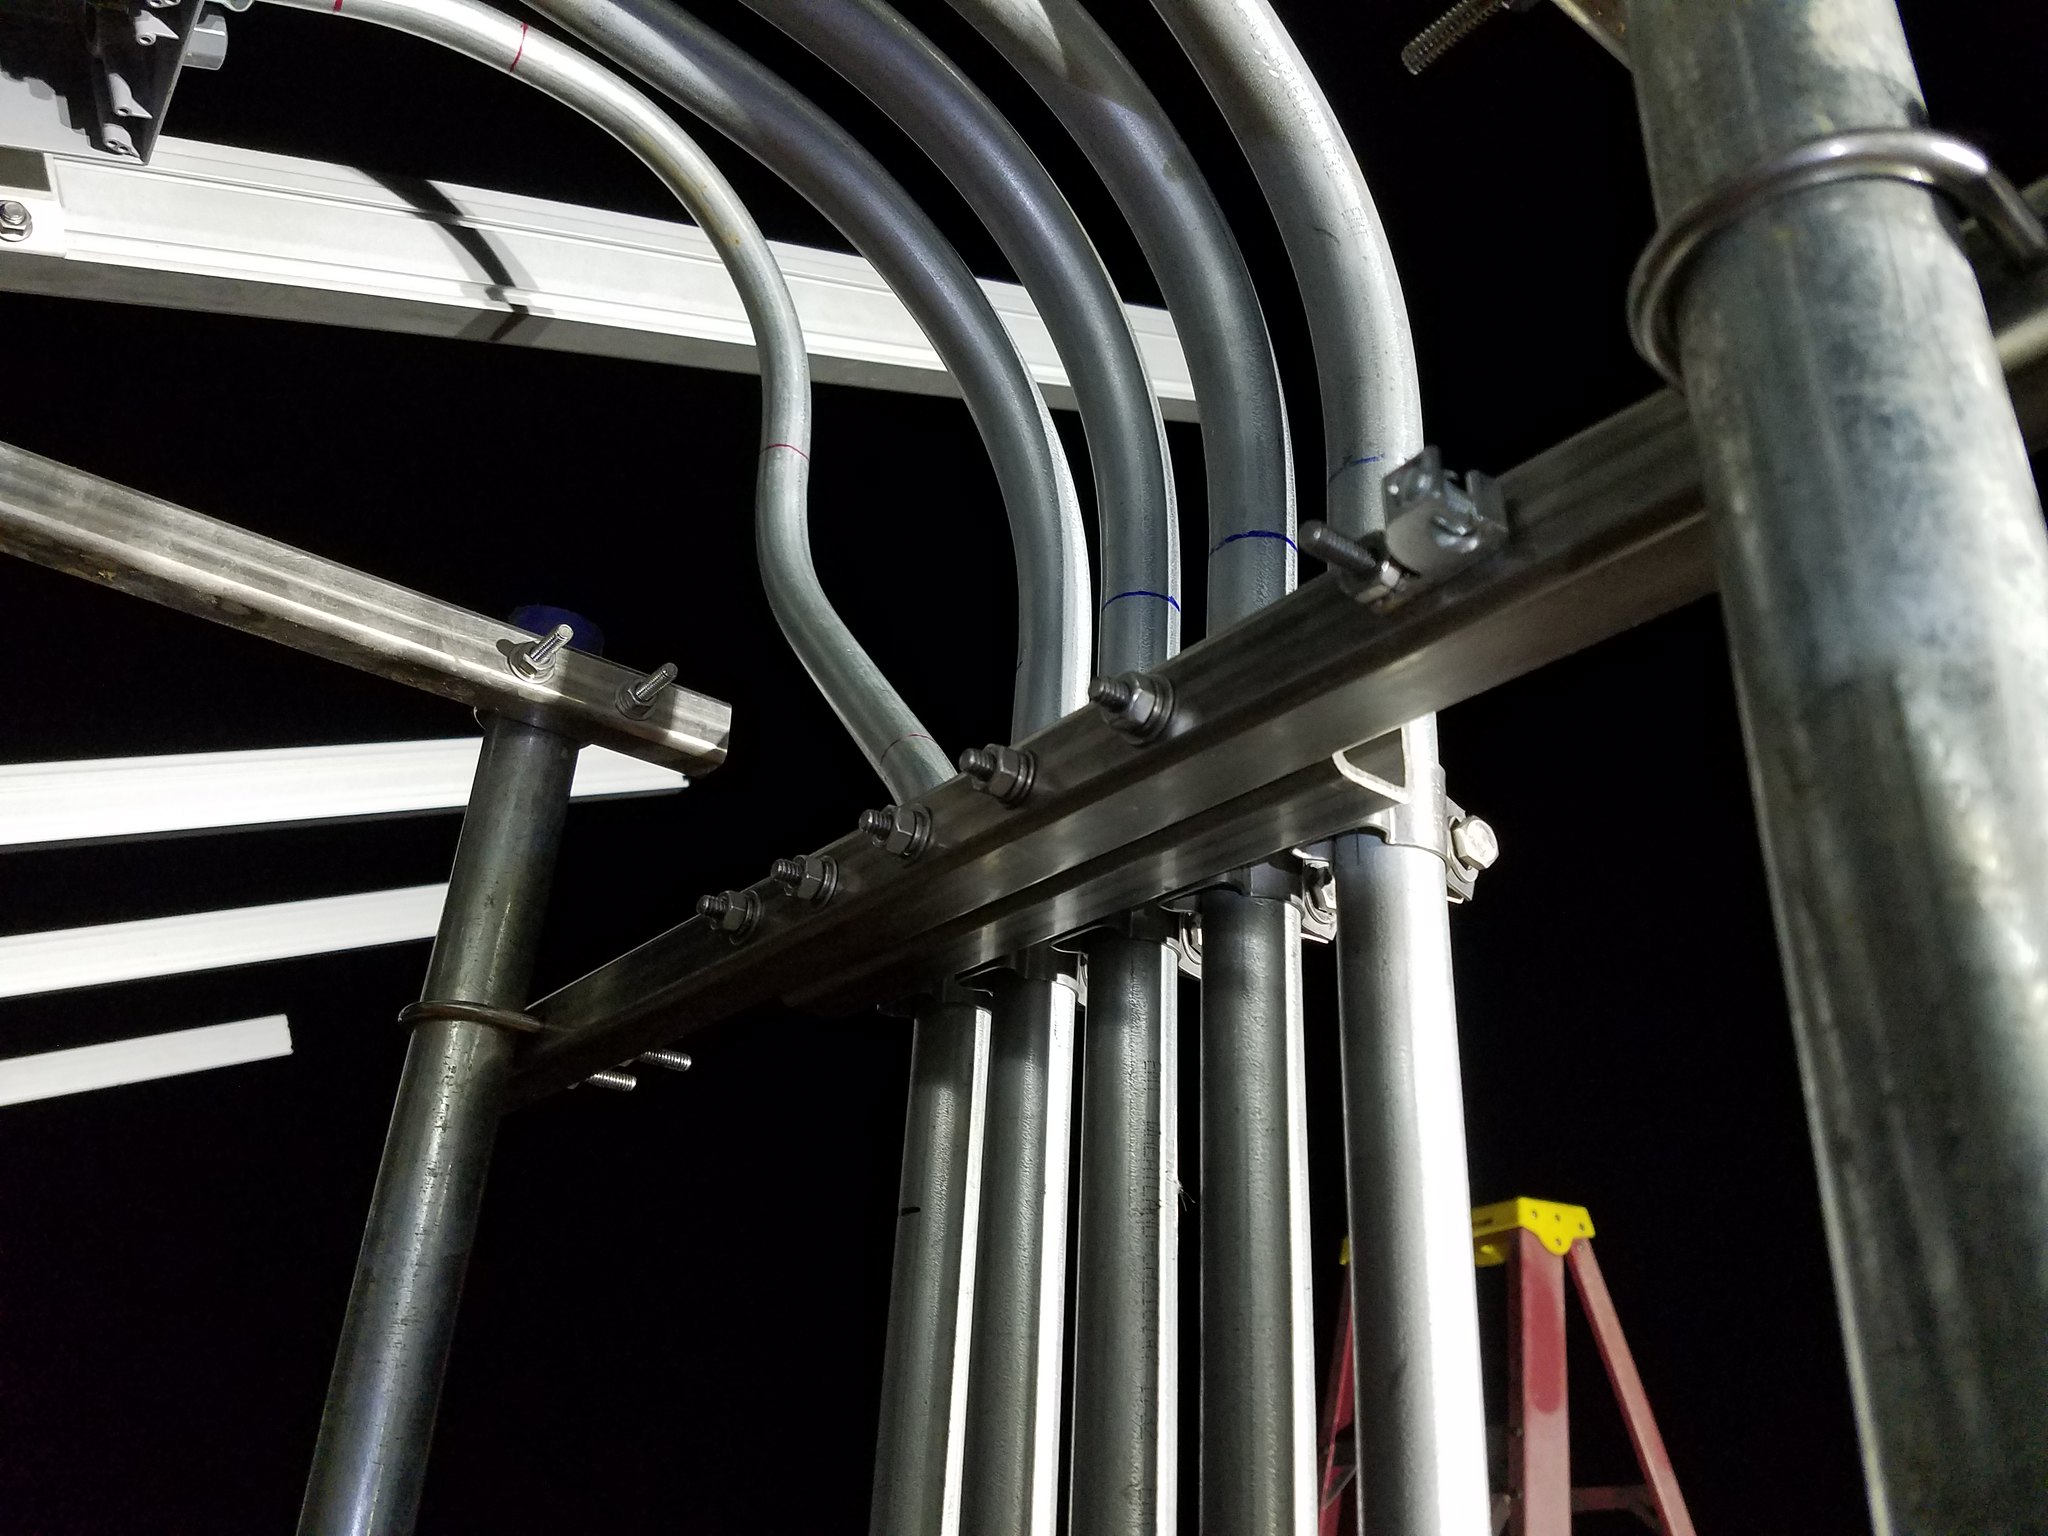
Here is a good shot of the 90 degree aluminum 2" x 3" x 1/4" brackets that really support that plate.
Last edited by tyab; 11-28-2016, 02:35 AM.Comment
-
Thanks for the links for the sno-pro - that sure looks like a great way to avoid scratching or breaking the pv surface when removing snow.Comment
-
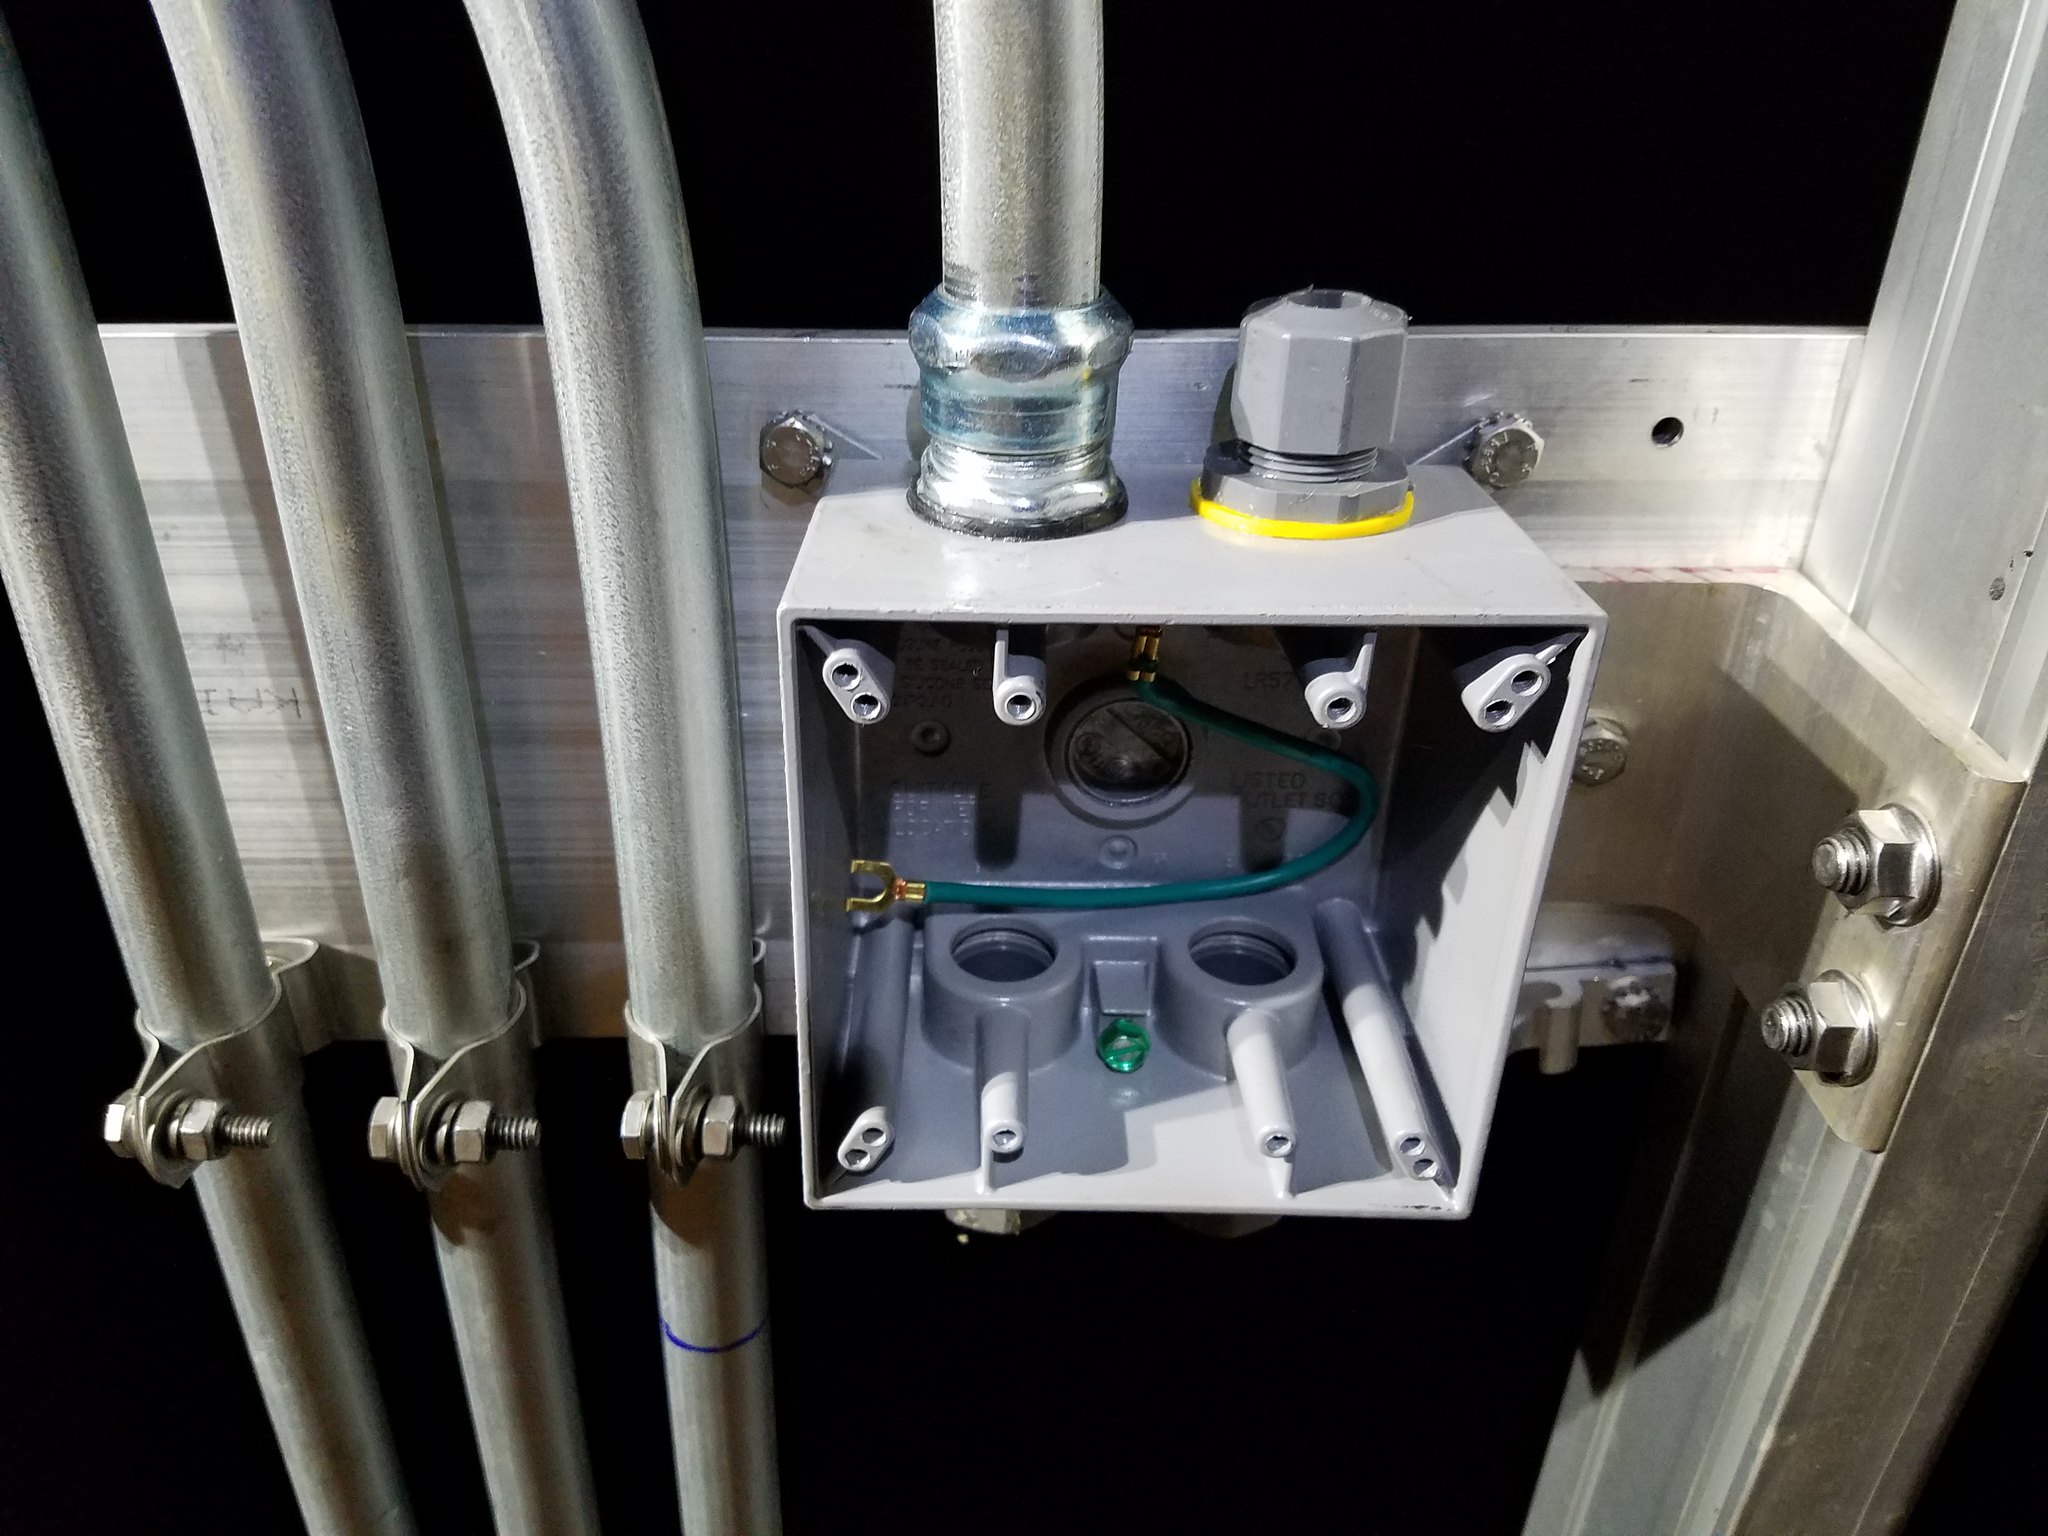
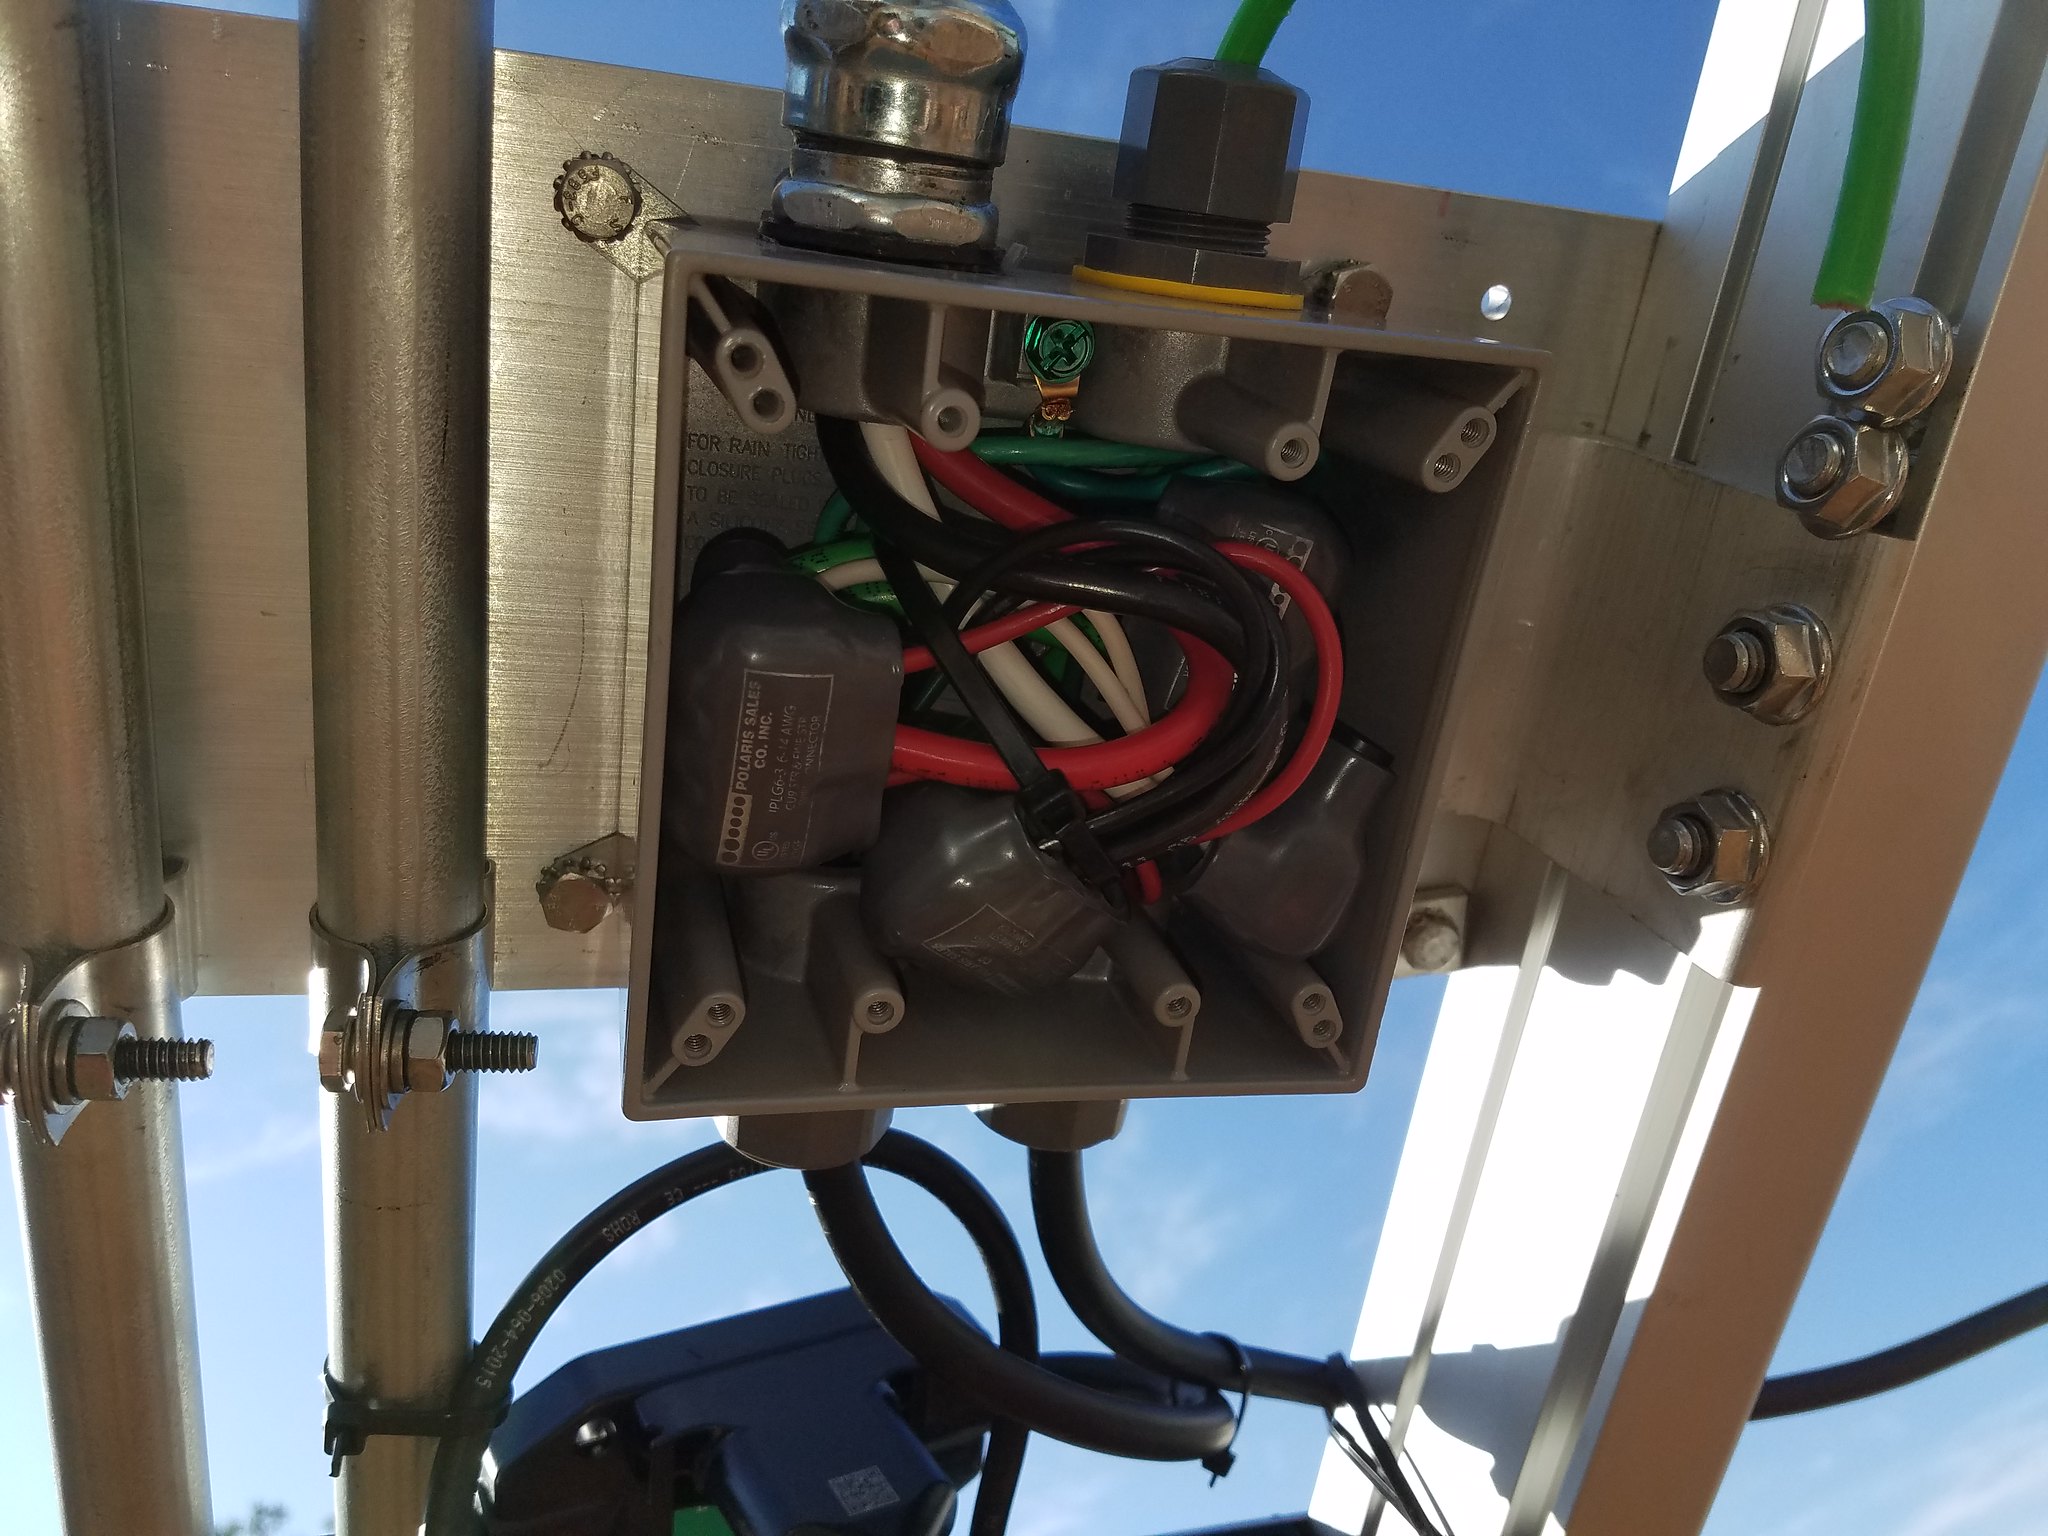
My long parallel run consists of parallel runs of 4/0 aluminum running underground in 3" PVC. Where it comes out of the ground at the solar panel, it transitions to 3" EMT and enters a 24" tall NEMA 4x junction box.
In this box is where we convert from the parallel runs to the conductors that go to the solar sub-panel. I'm using Polaris connectors to do this joining. They are simply wonderful.
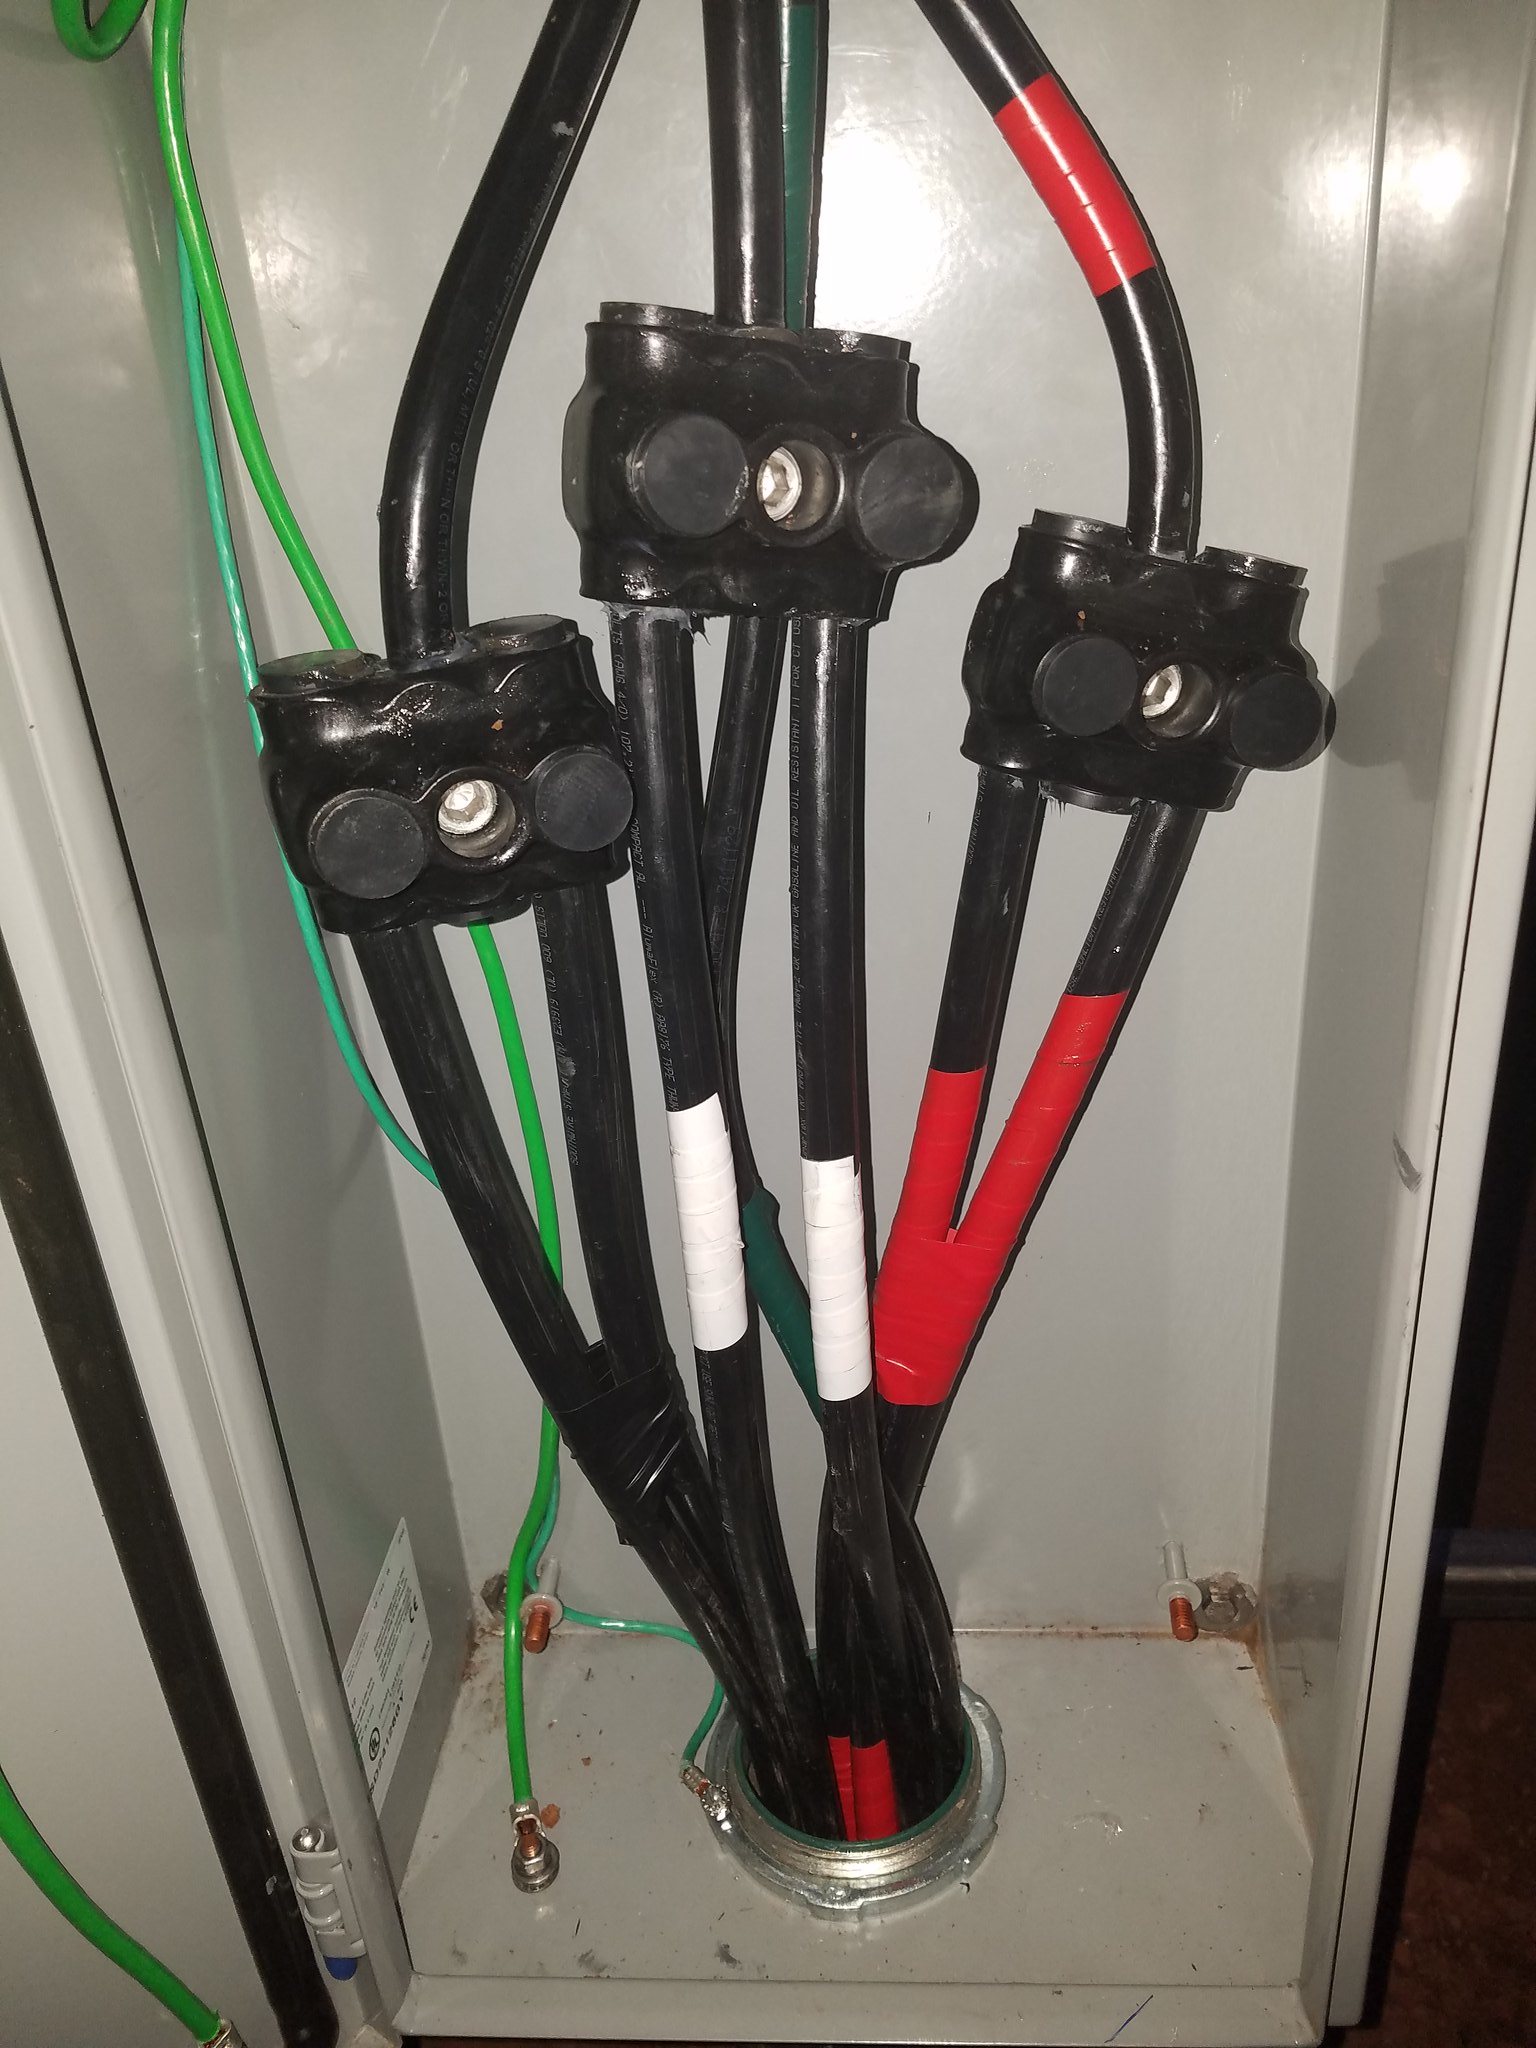
These are Polaris black IPLD 250-3. This means they accept up to 250 MCM size wire, and it has three ports. The ports on this series are on both sides, so I'm entering on the bottom on two of the ports and exiting on the top on the middle port. Each wire is held by a hex set-screw - similar to what is used on a sub-panel. So below I have the dual 4/0 aluminum entering on the bottom and exiting on the top with a single 3/0 copper.
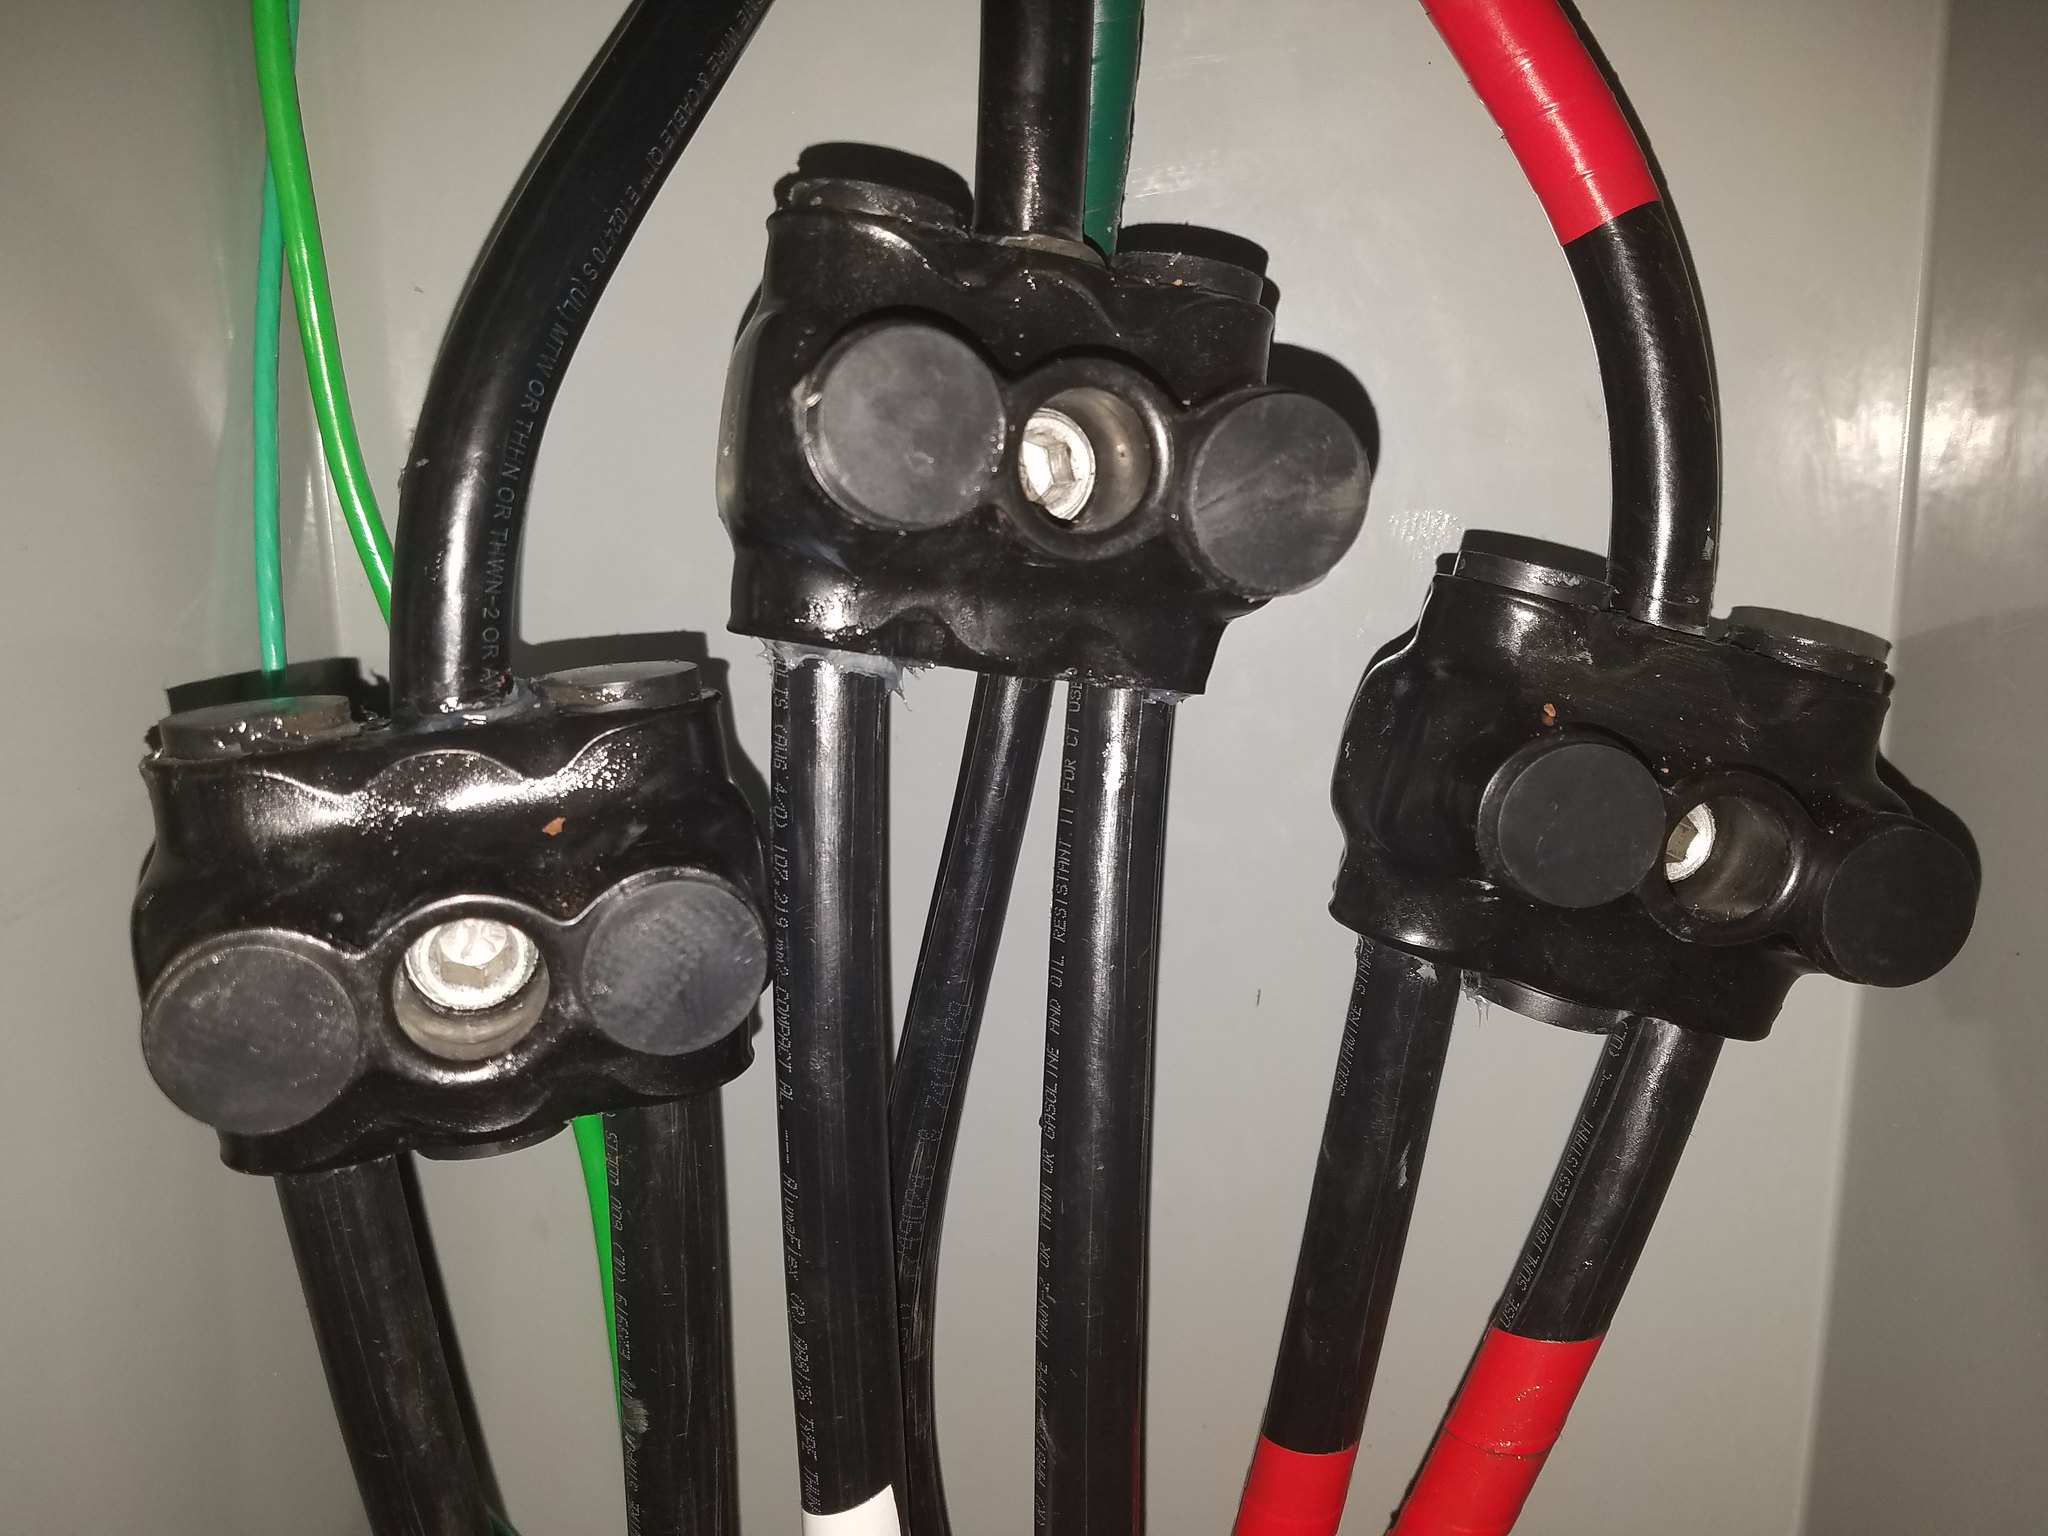
The 3/0 copper goes up into the solar subpanel. This is a Square D QO 200 amp NEMA 3R plug on neutral panel. Since the lugs are on the top - the wire has to traverse and loop back down. The single 2/0 aluminum (green tape in the back, mostly hidden by the other wires) is an EGC and goes directly to the sub-panel ground bar on the lower right.
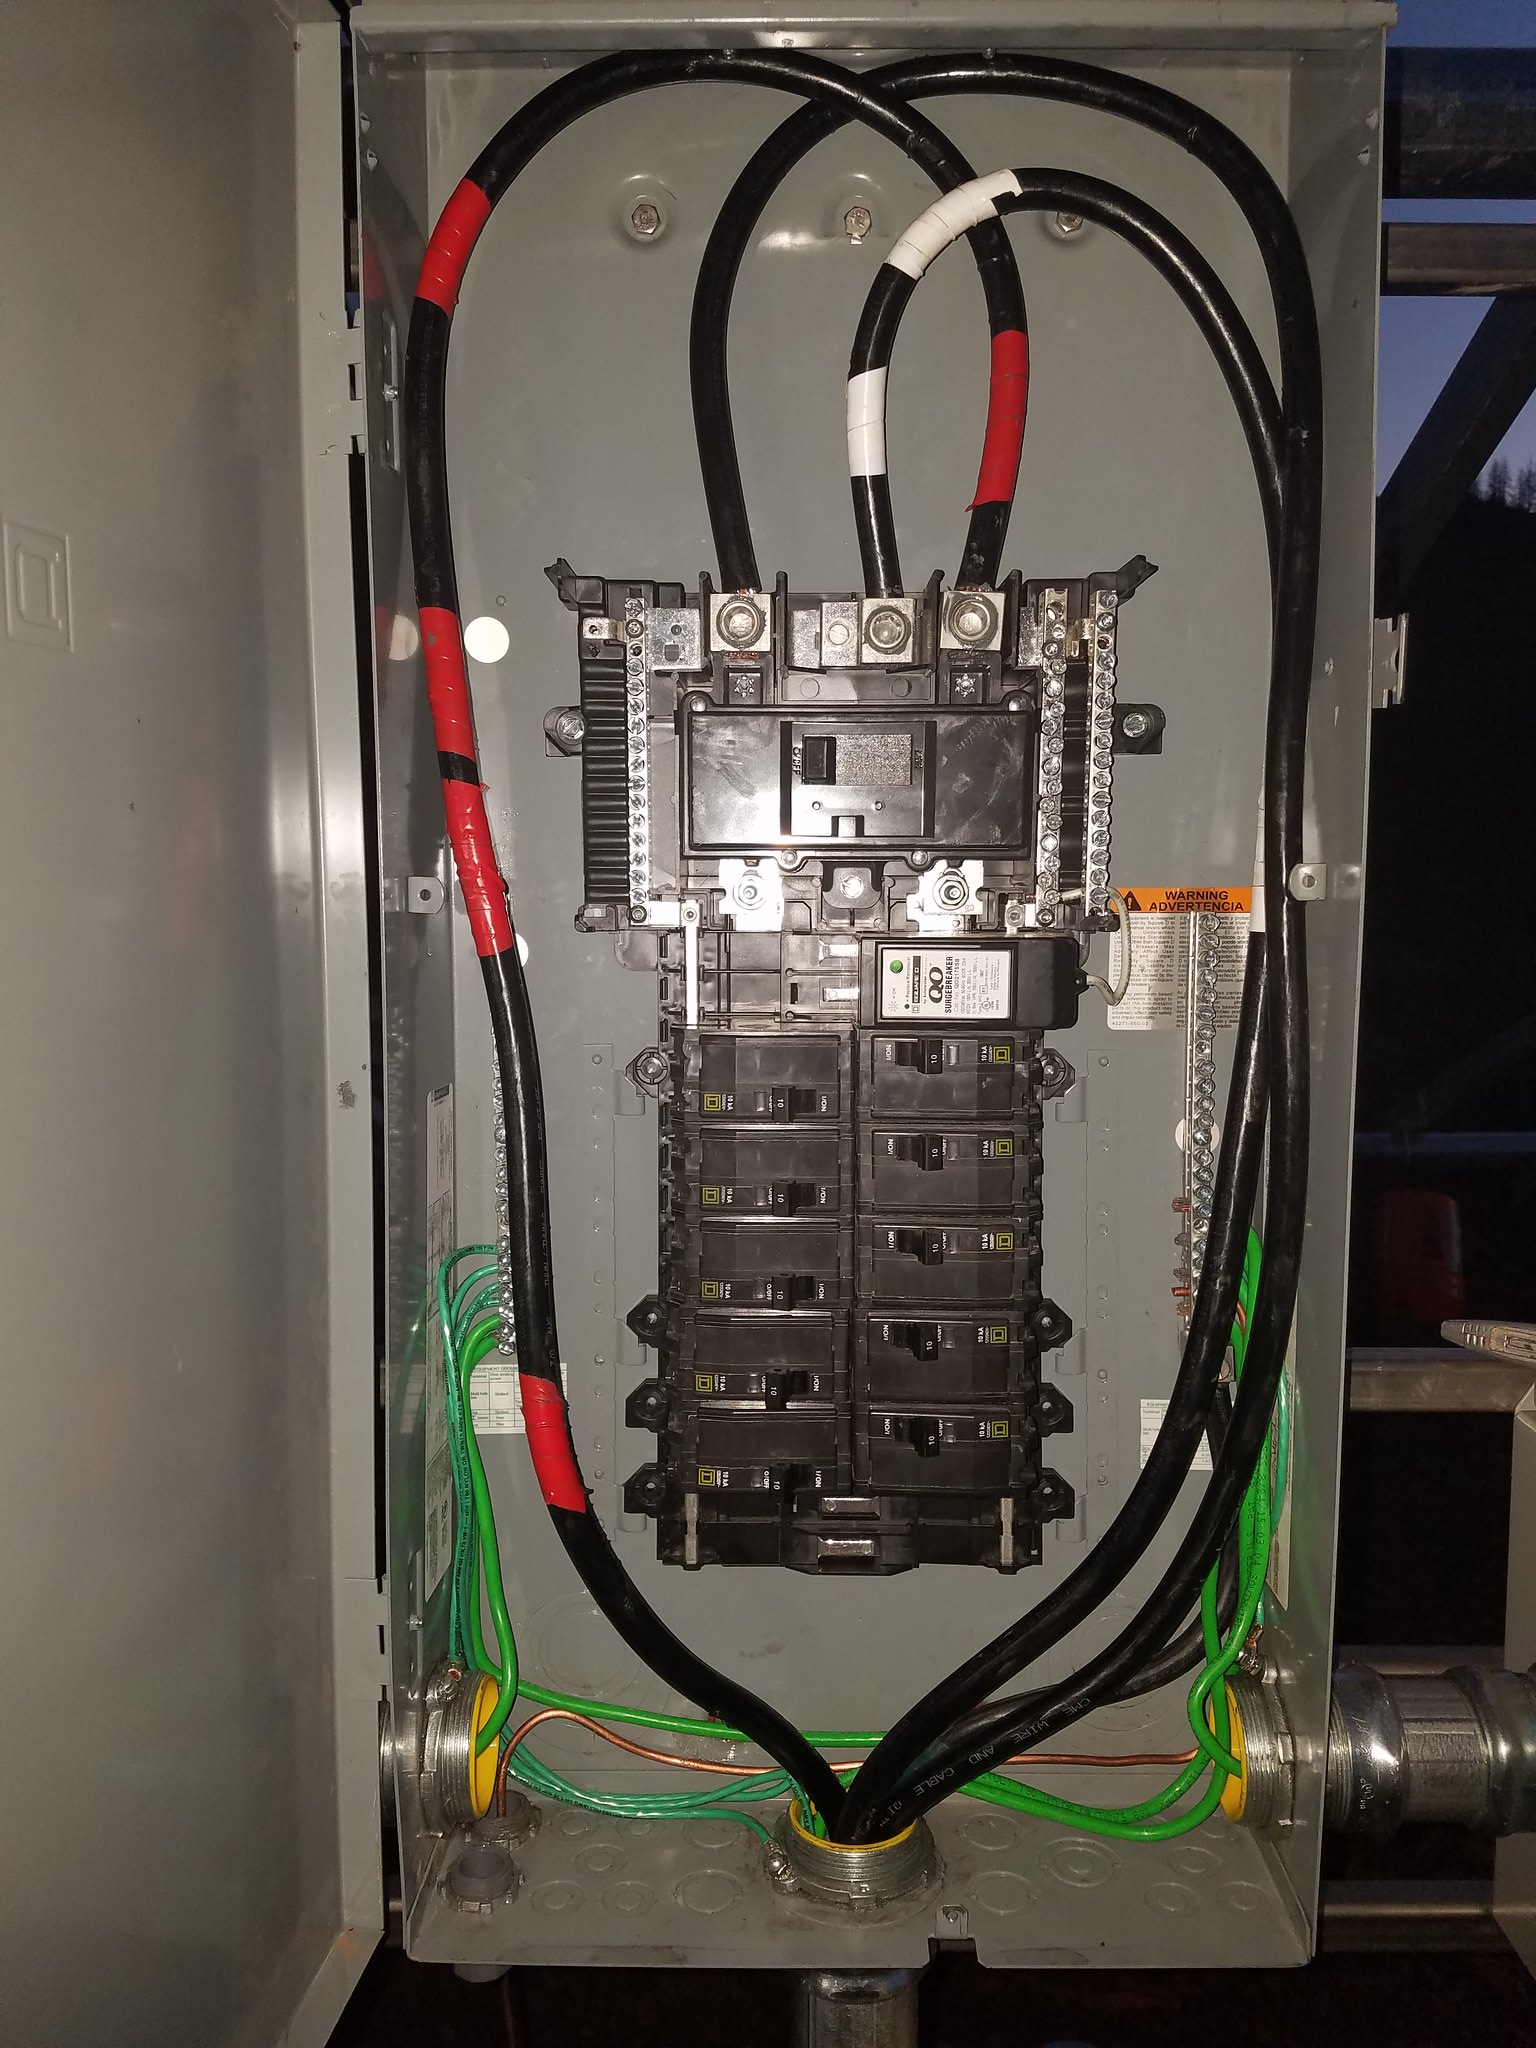
I still need to clean this up but it is so cold I can hardly bend that wire so it will stay like this until it warms up a enough to be able to bend the wire without my hands aching. 3/0 wire has a minimum bend radius of 4" from 312.6 so I have room to clean this up.
The main circuit breaker was down rated to 100 amps to match the OCPD at the service panel that feeds this. These main breakers are expensive but I found this one on EBay - brand new for insane savings.
Installed in the sub-panel are the ten 10 amp circuit breakers for the row strings, each string will have 8 microinverters current limited to 8 amps so 10 amp works out perfect with the 125% adjustment required by 690.9(B).
The upper right corner is type 2 surge protection per 780.4.20. This is a Square D QO2175SB surge arrestor.Last edited by tyab; 11-28-2016, 02:32 AM.Comment
-
Today I started by checking all of the bolt torque values for mounts 1 and 2 and in the process applied anti-seize to those stainless bolts I did not do before. I'm glad I took the time to do that - I did find some rail adapter bolts that were barely hand tight - I must have forgot to torque them due to dark or cold or just being in a hurry. With the Iron Ridge setup, you use either 204, 180 or 60 inch pounds depending on the bolt.
Then my son help me vacuum pull tape in all of the installed 3/4" EMT, and we re-vacuumed the 2" run from mount 1 to the pull boxes for mounts 3 and 4. Pulled a rag through both of them to remove the final left over sand/dirt we missed in the initial vacuuming.
Then I needed a brace to hold the #6 wire we are using for row strings for each mount to mount 1. Each reel is 500' and is rather heavy and I have the reels about 6' off the ground to have a decent angle into the boxes.
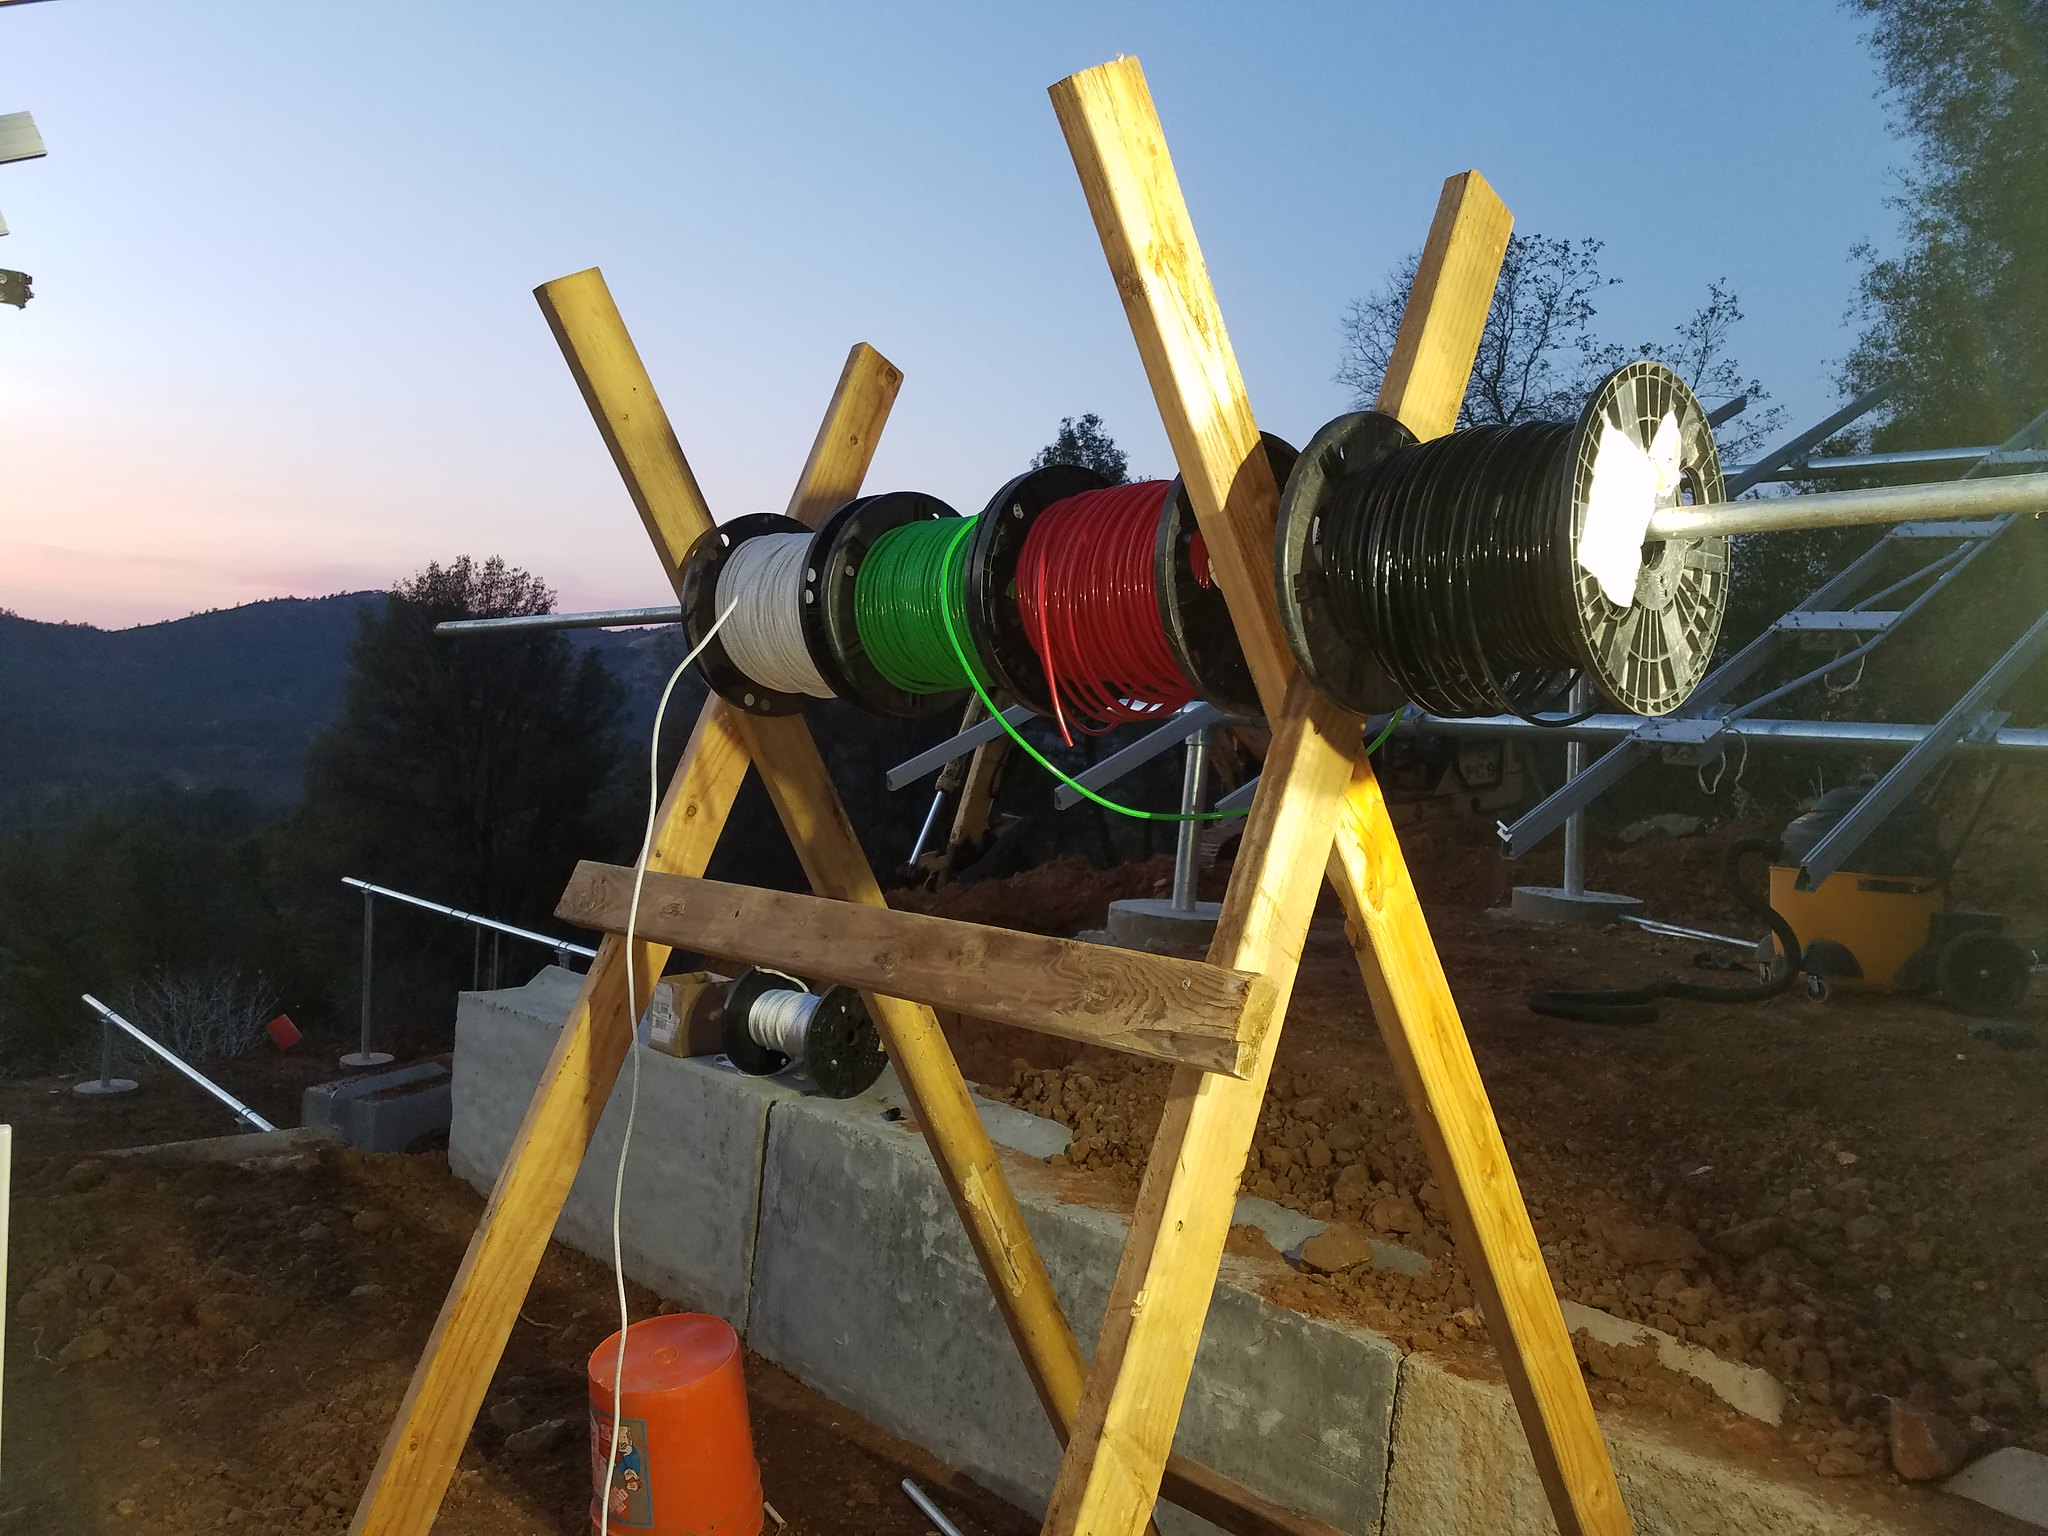
Then I pulled all of the EMT for mount 1 since it would be the easiest pull since there is no run of 2" involved, just basically push it through the EMT on this mount. Even in the cold it was surprising how easy that #6 SimPull wire pulls.
I left it at that - too cold to then do any more work. Tomorrow we will see how 21 #6 wires pull through that 2" EMT. Still trying to decide if I want to pull them all at once or as rows using multiple pulls. Mount 2 is about a 45' pull and overall about 4' elevation higher to the junction box exit.Last edited by tyab; 11-28-2016, 02:29 AM.Comment
-
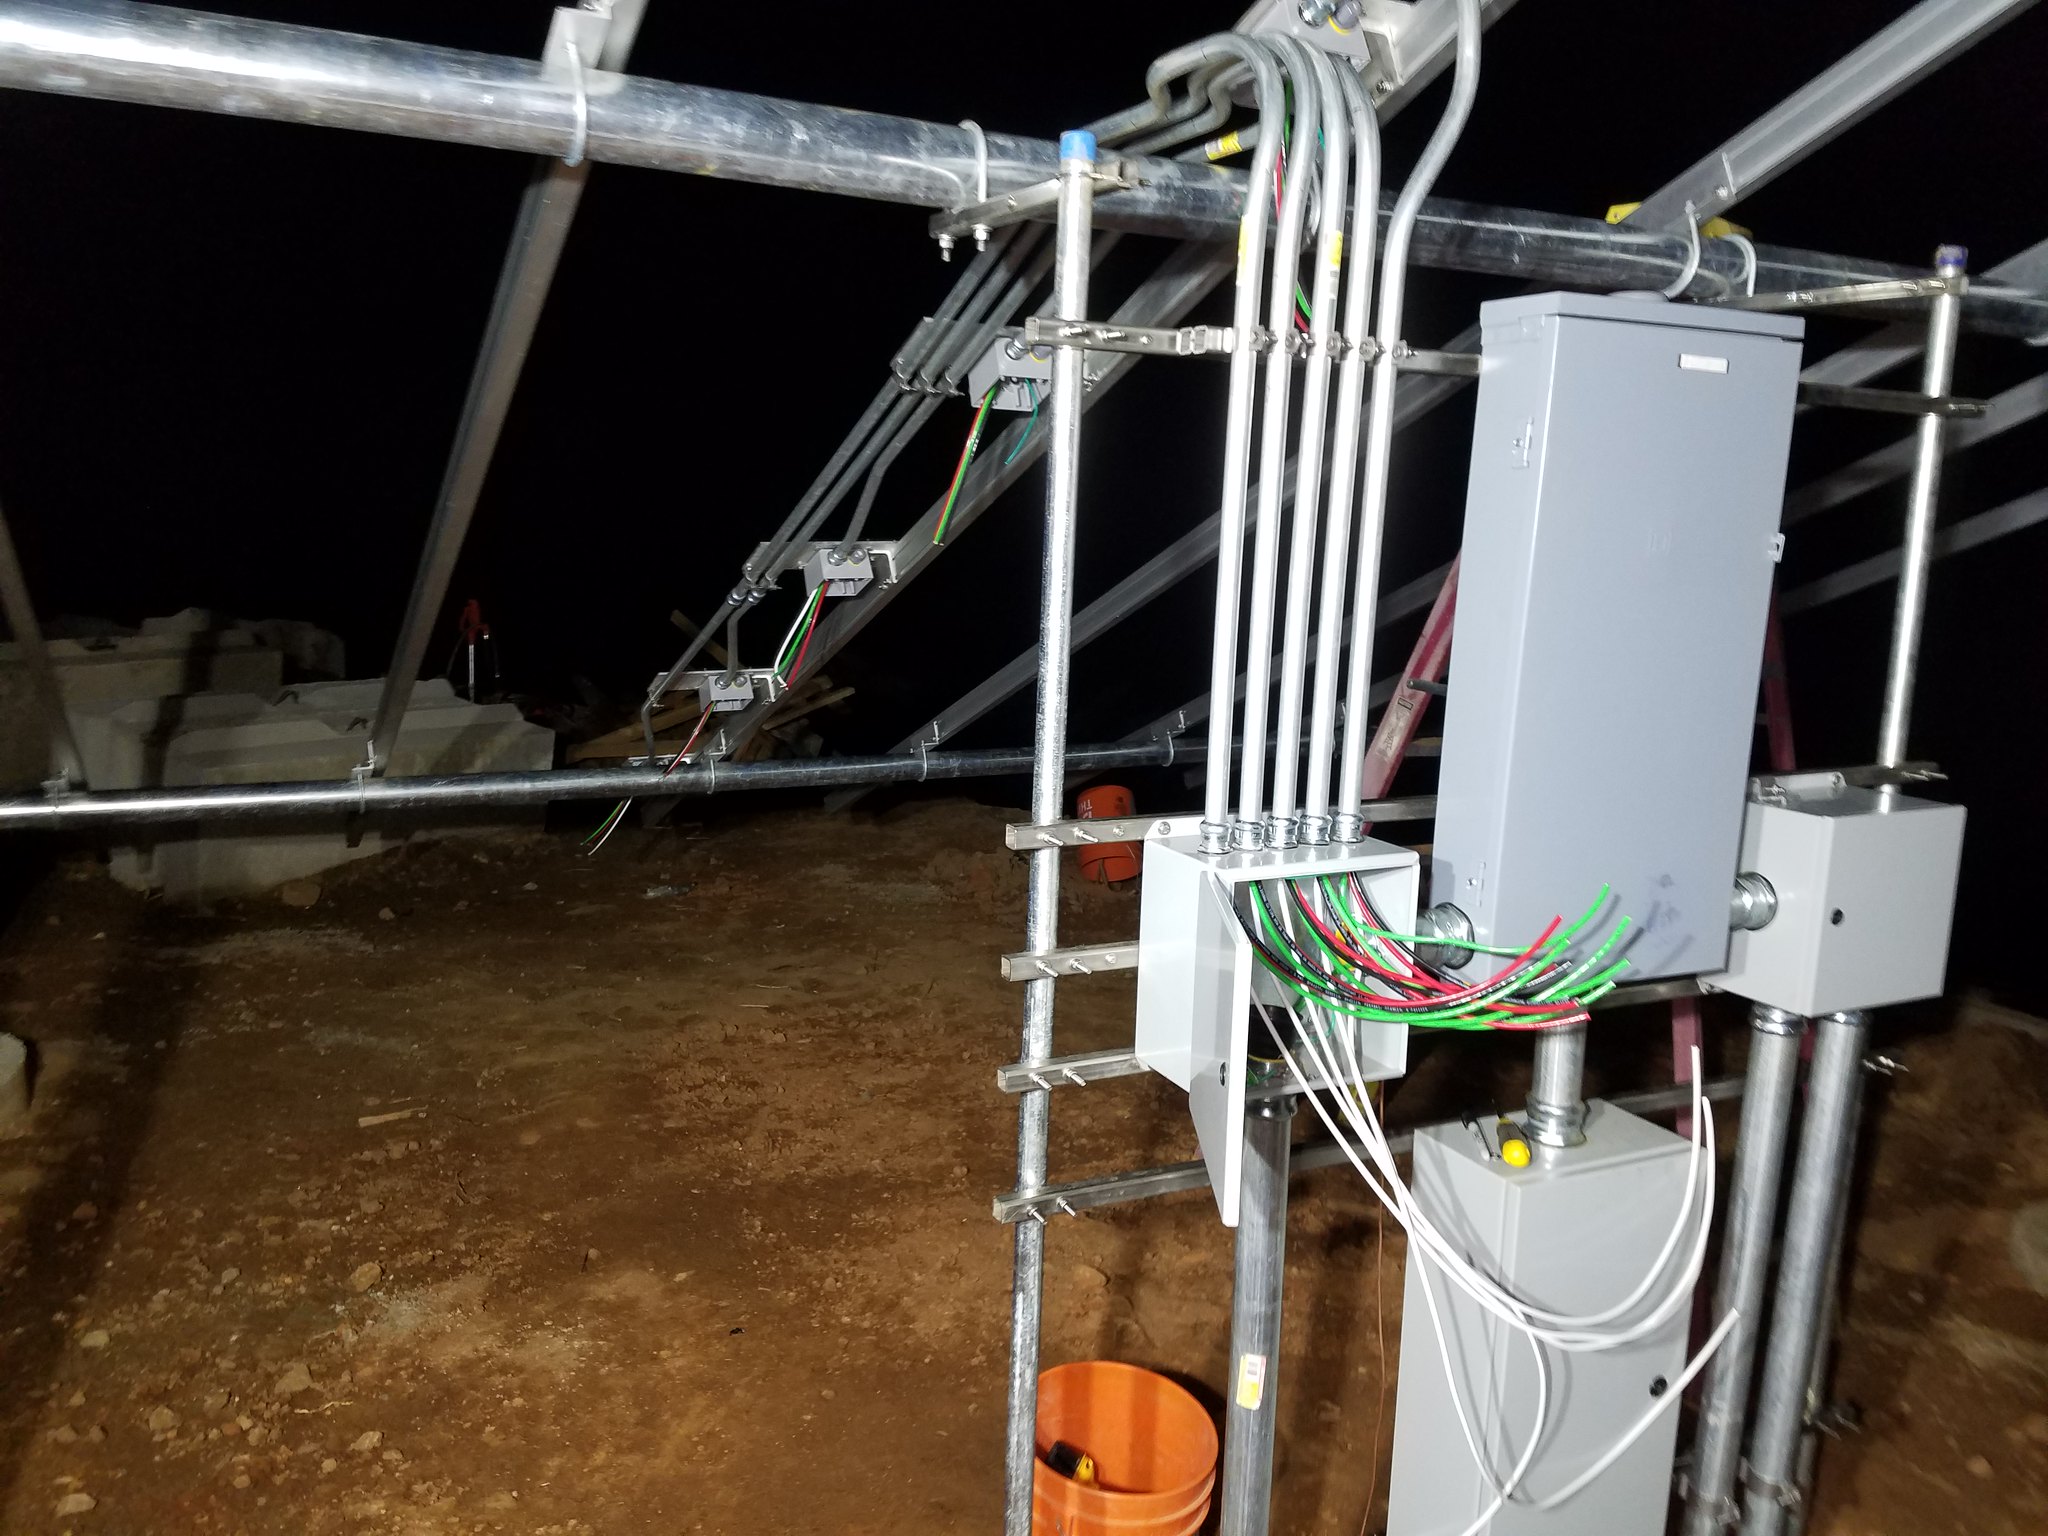
Buchman crimps are excellent for EGC's when trying to save space and you want a solid bond. This is thee #12's and one #10 using an Ideal 2011S copper crimp and the Buchman crimp tool.
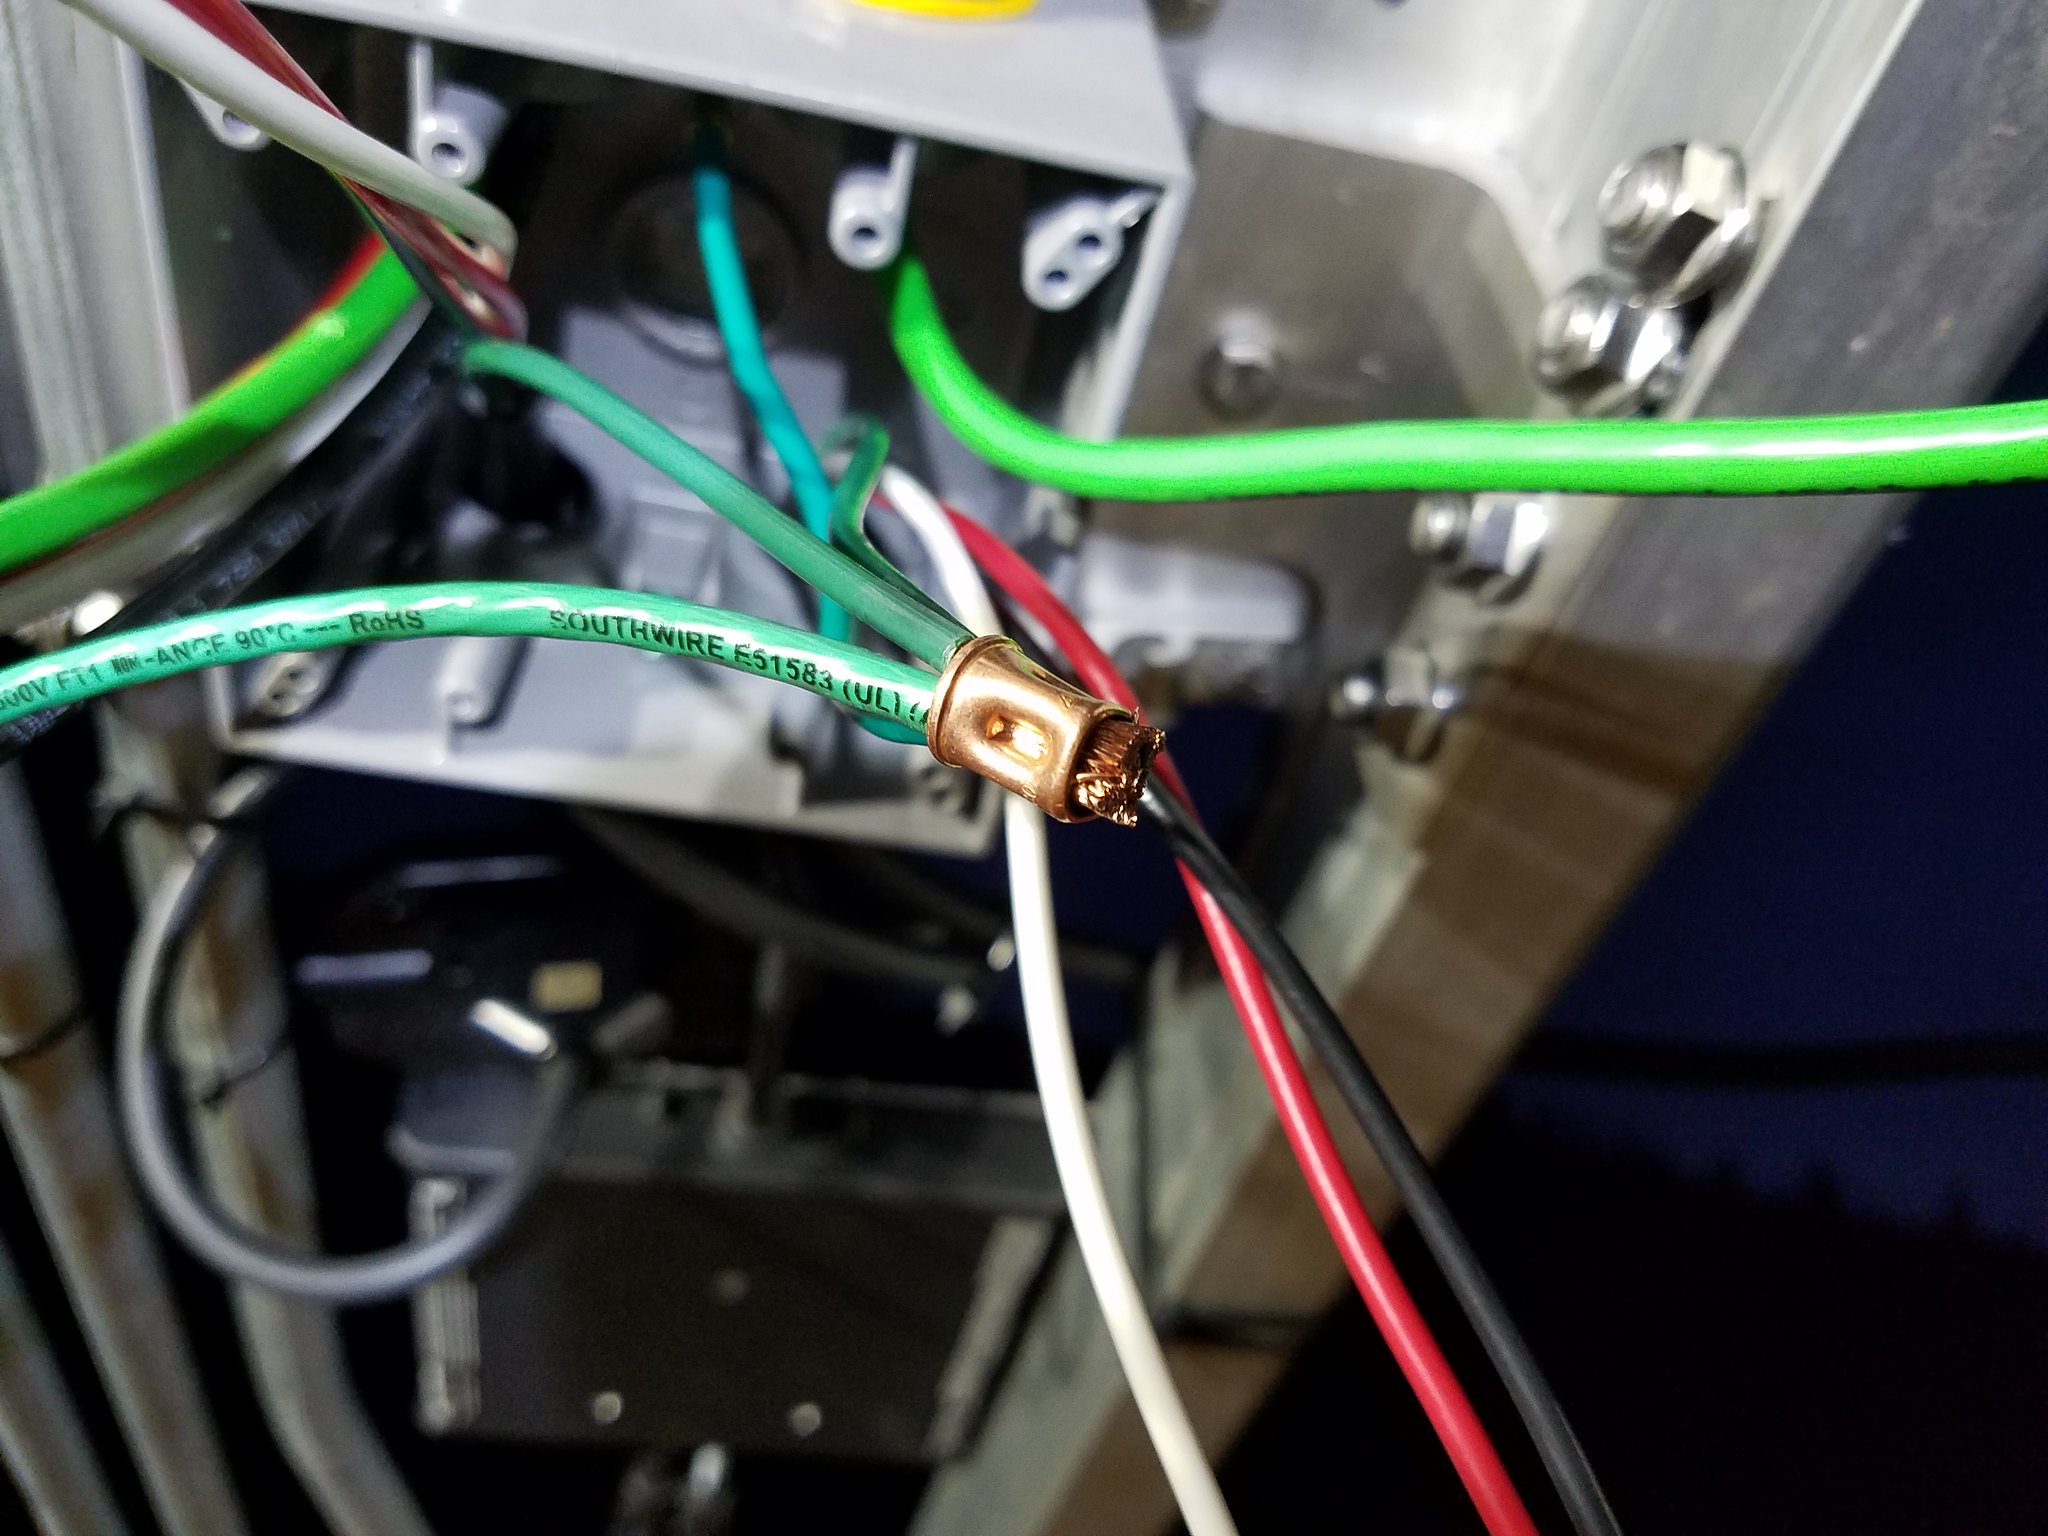
Two of the #12 are from the two Enphase cables, the third is the pigtail that goes to the box. The #10 goes to the Polaris grey connecter and combines with two #6's. These Polaris greys make combining wires with #6 so easy.
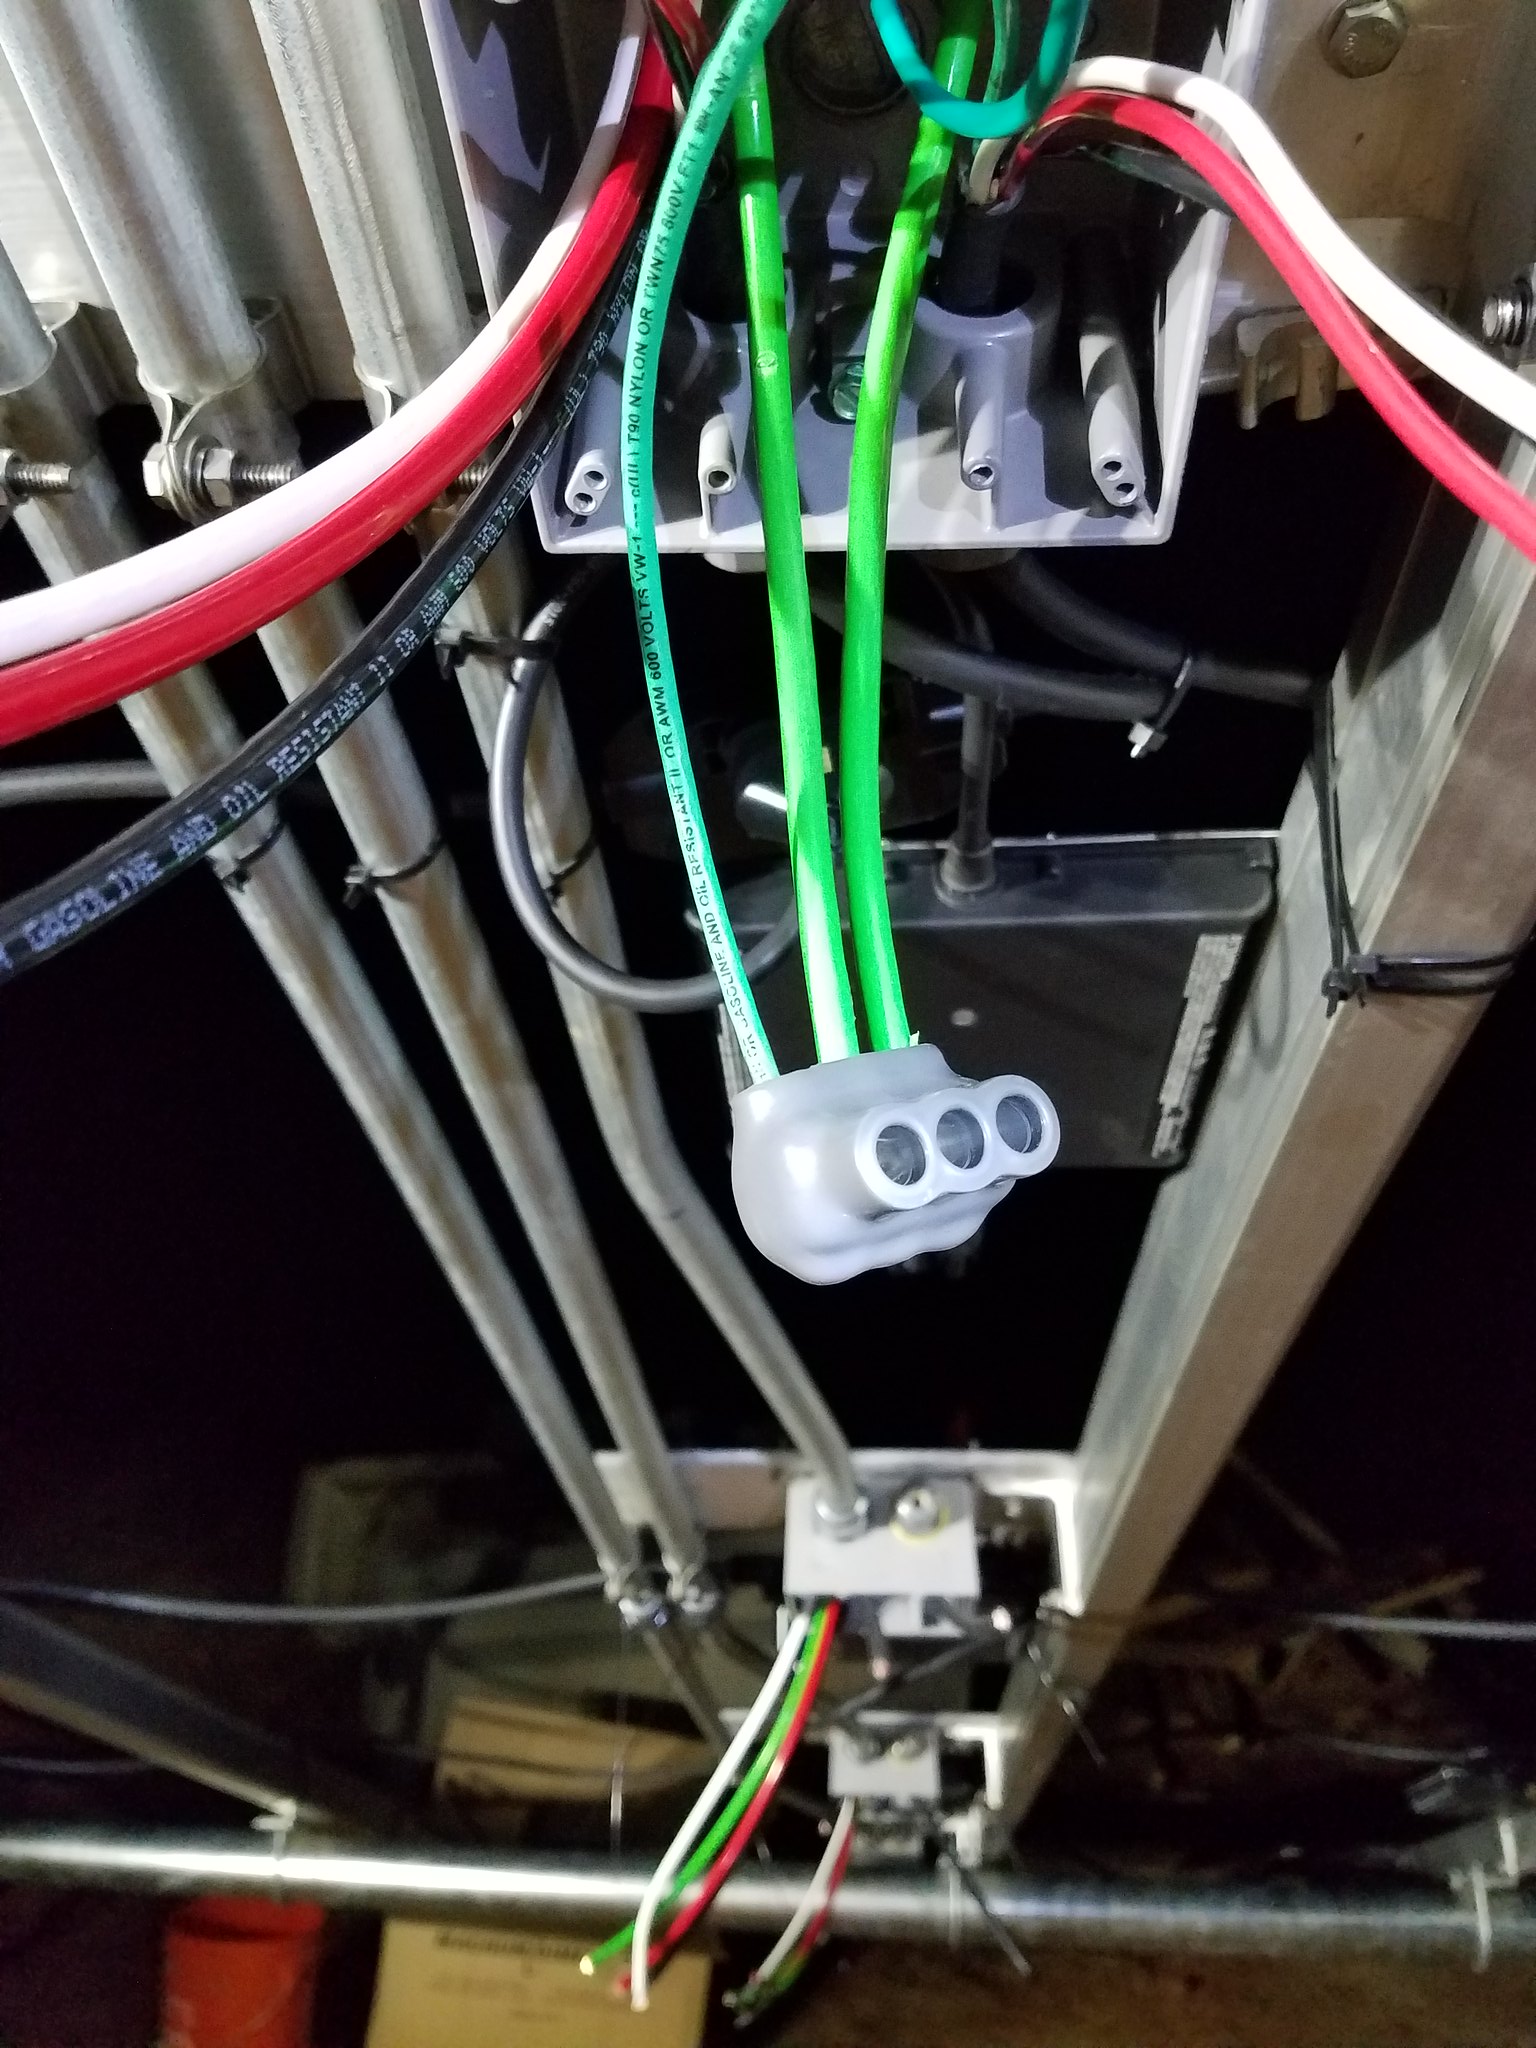
And the finished junction box with four Polaris greys and that Buchman crimp.
The two Enphase cables comes in via the lower strain reliefs and consists of four #12 conductors each. Those are Arlington LPCG757. The upper string relief holds a #6 green EGC bond to the bracket that still needs to hooked up to a ground lug which I have not put on yet. That is an Arlington LPCG753. The EMT has four #6 conductors that head to the sub-panel. Hidden from view is the Buchman crimp used to combine the #12 EGC's. Four Polaris grey's are used to combine the wires and it all fits in that 36 cubic inch box. I have a wire tie holding everything in place since this opening faces down and I don't want everything to fall.
I only did the one junction box. That Enphase cable really needs a cable slitter - it took me quite a lengthy time to carefully cut off that covering without nicking any of the 4 wires inside. Too long to do a bunch more and a single slip/nick of a conductor in there can create a massive headache. I ordered an Ideal cable slitter on Amazon - I'm smacking myself for forgetting to get this ahead of time - I knew I needed it.Last edited by tyab; 11-28-2016, 02:25 AM.Comment
-
With help from the family, we started installing panels on mount 1. Rain stopped us finishing the last two rows but it sure felt good to get those three rows up. Took me too long to align the bottom row - I was making it so much harder than it should have been - but now I have it dialed in for the next mounts. The ladder behind that 3rd row is an 8 foot ladder.
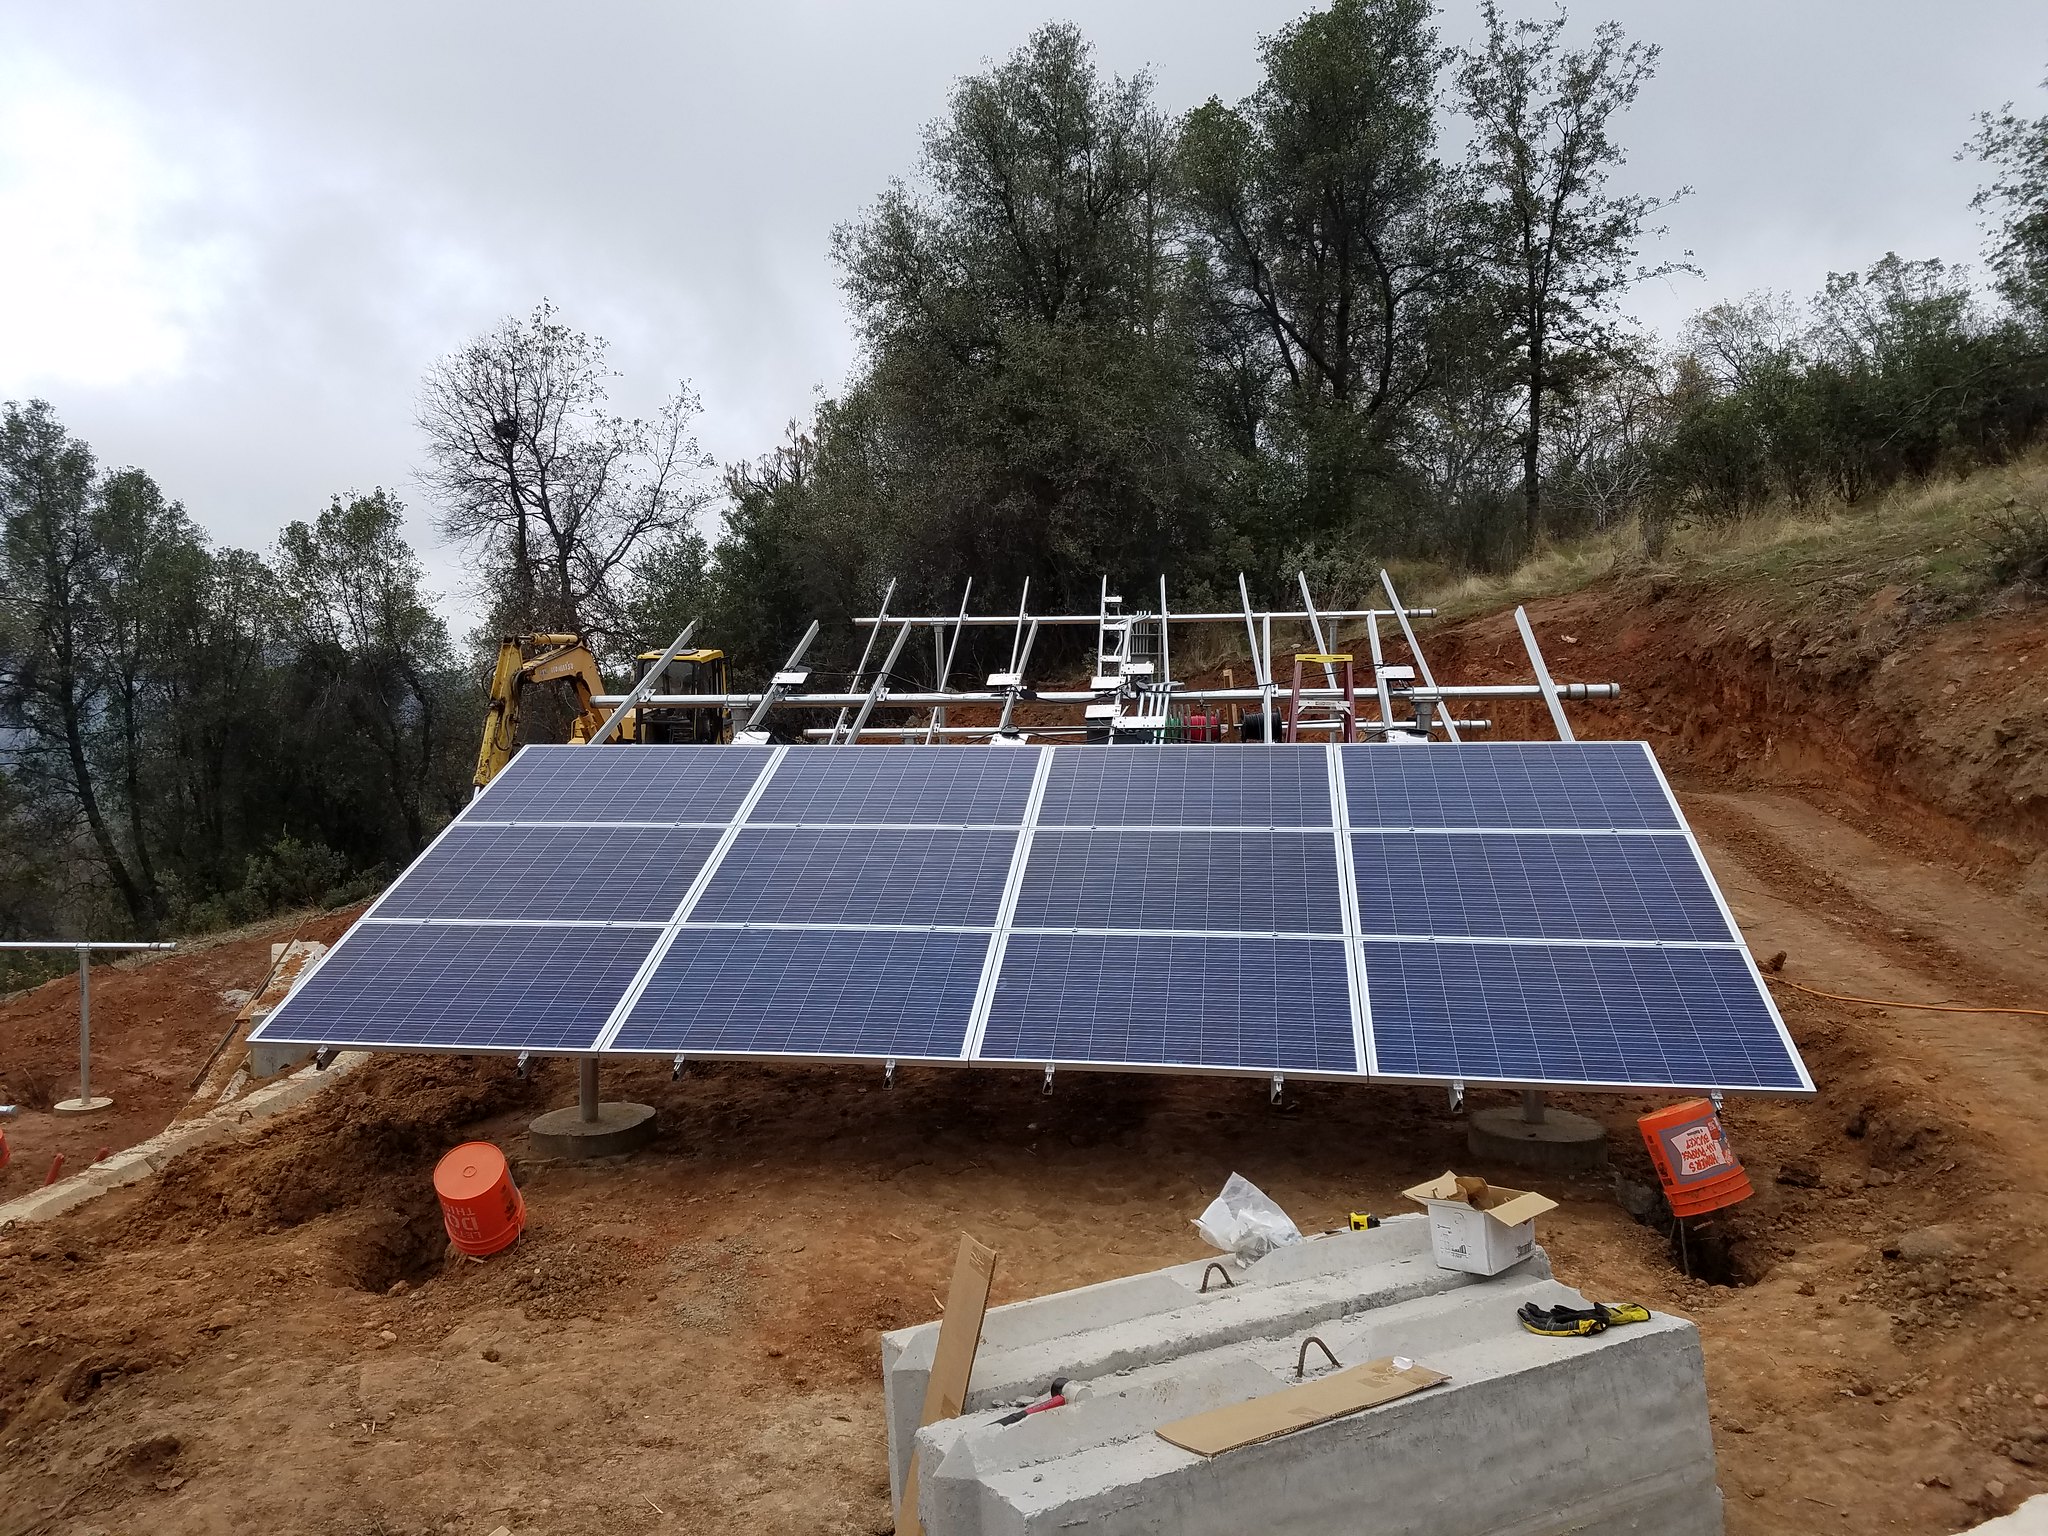
I'm spacing the panels about 1/4" East/West to match the 1/4" North/South spacing enforced by the Iron Ridge grounding mid-clamps. Those clamps are torqued to 84 inch pounds.
Getting the panels down there was an issue. They don't fit in my quad trailer and even if they did - I would hate for a panel to get cracked from that metal trailer. What we did was take out the back seat of the Yukon XL and put the panels carefully inside. Then using 4WD low - I backed down slowly until the first pad area. Then we just pulled them out when needed. This way I avoided trying to turn around - just drive back up. My fear is that grade is steep and I was thinking that big car may be at risk of rolling over trying to turn around on that grade.
Heavy rain/hail has shut me down for now. Time to get back to cutting/drilling stainless steel for brackets for the lightning protection system.Last edited by tyab; 11-28-2016, 02:20 AM.Comment
-
I think pics are finally fixed. Turns out that Google photos direct links simply are flaky - they expire for everyone except the owner. So the pics looked fine to me but they disappeared for everyone else. I added the flickr app to my phone, had it upload all my solar pics, made them public, and they provide direct links that seem to work on this forum.Comment
-
Powerfab top of pole PV mount (2) | Listeroid 6/1 w/st5 gen head | XW6048 inverter/chgr | Iota 48V/15A charger | Morningstar 60A MPPT | 48V, 800A NiFe Battery (in series)| 15, Evergreen 205w "12V" PV array on pole | Midnight ePanel | Grundfos 10 SO5-9 with 3 wire Franklin Electric motor (1/2hp 240V 1ph ) on a timer for 3 hr noontime run - Runs off PV ||
|| Midnight Classic 200 | 10, Evergreen 200w in a 160VOC array ||
|| VEC1093 12V Charger | Maha C401 aa/aaa Charger | SureSine | Sunsaver MPPT 15A
solar: http://tinyurl.com/LMR-Solar
gen: http://tinyurl.com/LMR-ListerComment
 Tweet
Tweet

Working...
😀
😂
🥰
😘
🤢
😎
😞
😡
👍
👎
☕
Comment